Get started with email campaigns
 Updated
In this detailed guide, we'll navigate you through the exciting journey of leveraging our Email Campaign Manager Add-On. This powerful tool is designed to enhance your marketing efforts and streamline your email campaigns seamlessly.
1. Installation Guide:
Firstly, let’s start with the installation process. This step-by-step guide will help you effortlessly integrate the Email Campaign Manager into your existing Stockpilot setup. Follow these simple instructions to ensure a successful installation:
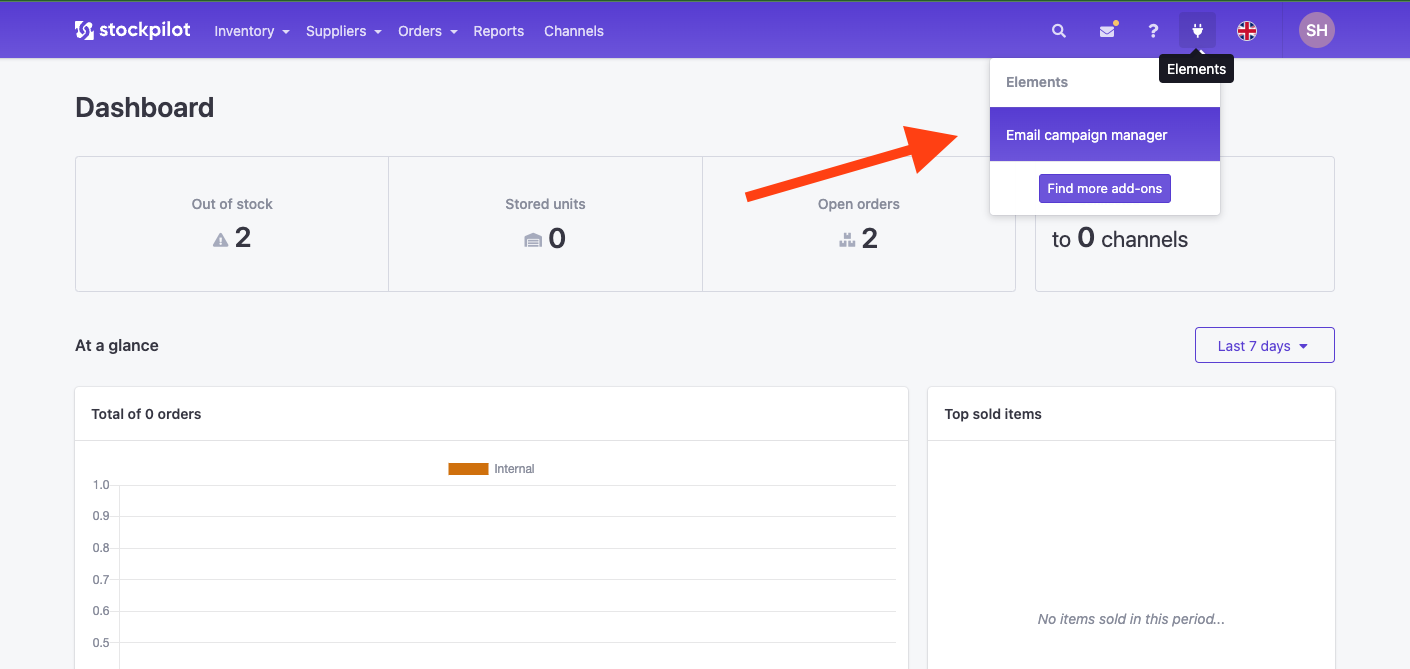
To begin the installation process, first locate the 'Plug' icon situated in your menu bar. Click on this icon to reveal a dropdown menu. Within this menu, select the 'Email Campaign Manager' option to proceed.
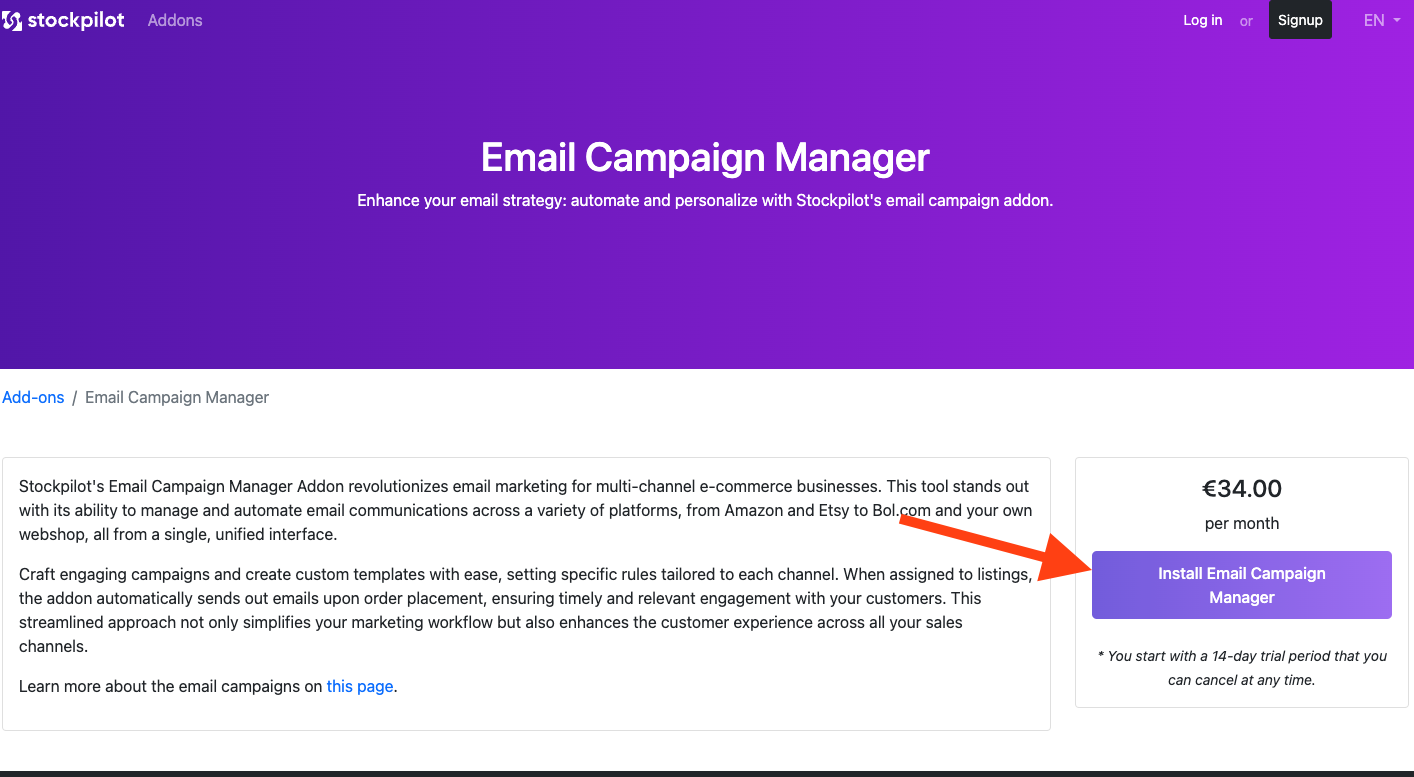
Upon selecting the 'Email Campaign Manager' option, you will be redirected to the Stockpilot Elements Marketplace. Here, locate and click on the 'Install' button to initiate the installation process for the Email Campaign Manager add-on.
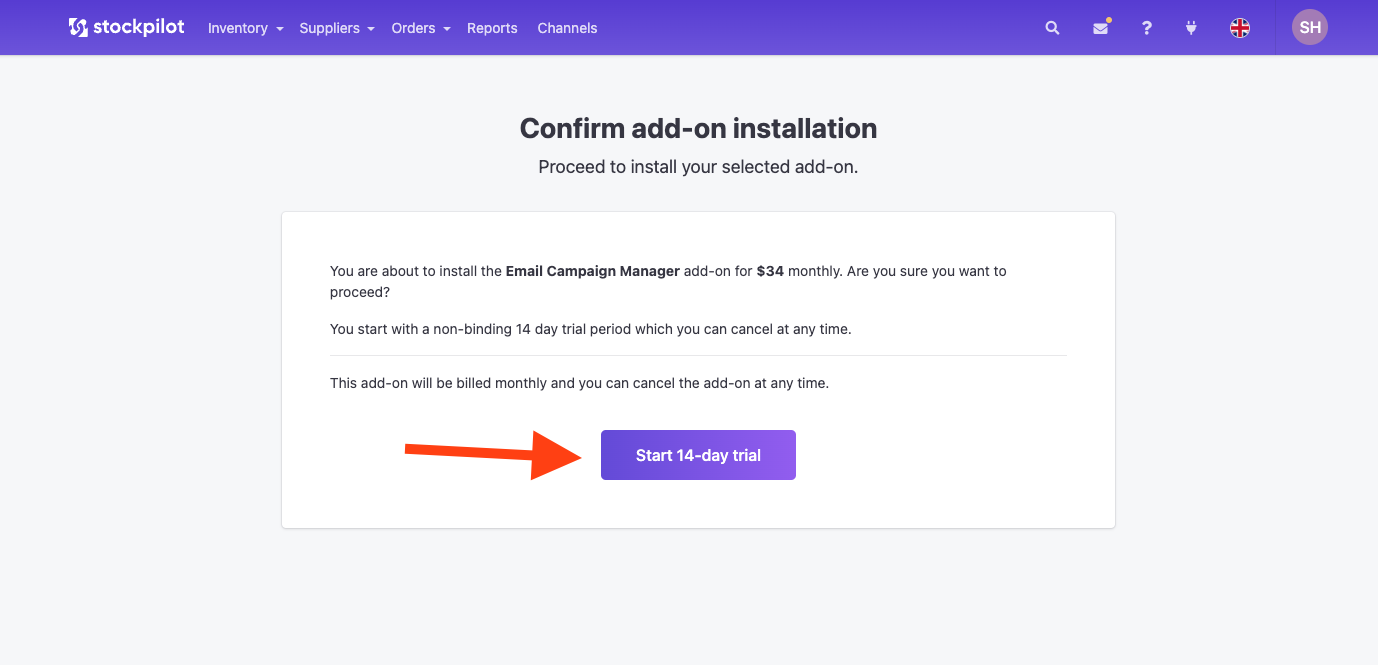
Following your click on the 'Install' button, you will be prompted to confirm the installation of the Email Campaign Manager add-on. Please note that this add-on comes with a 14-day free trial period, offering you the flexibility to evaluate its features without commitment. If you decide to cancel during or after the trial period, detailed instructions on how to do so are provided in this helpful article.
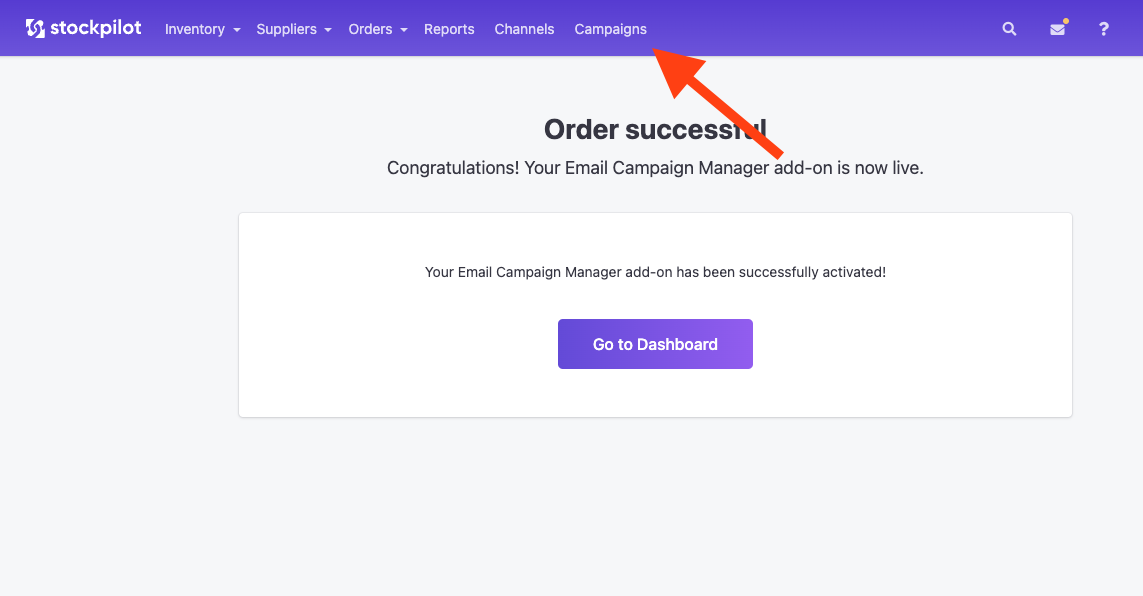
With the installation of the Email Campaign Manager now complete, you'll notice an additional item labeled "Campaigns" in your menu bar. This new feature provides direct access to all the functionalities of the Email Campaign Manager.
2. Creating Your Campaign:
Once installed, it's time to unleash your creativity. This section walks you through the process of crafting your first email campaign. We cover everything from setting up your templates and how to manage them in your campaigns:
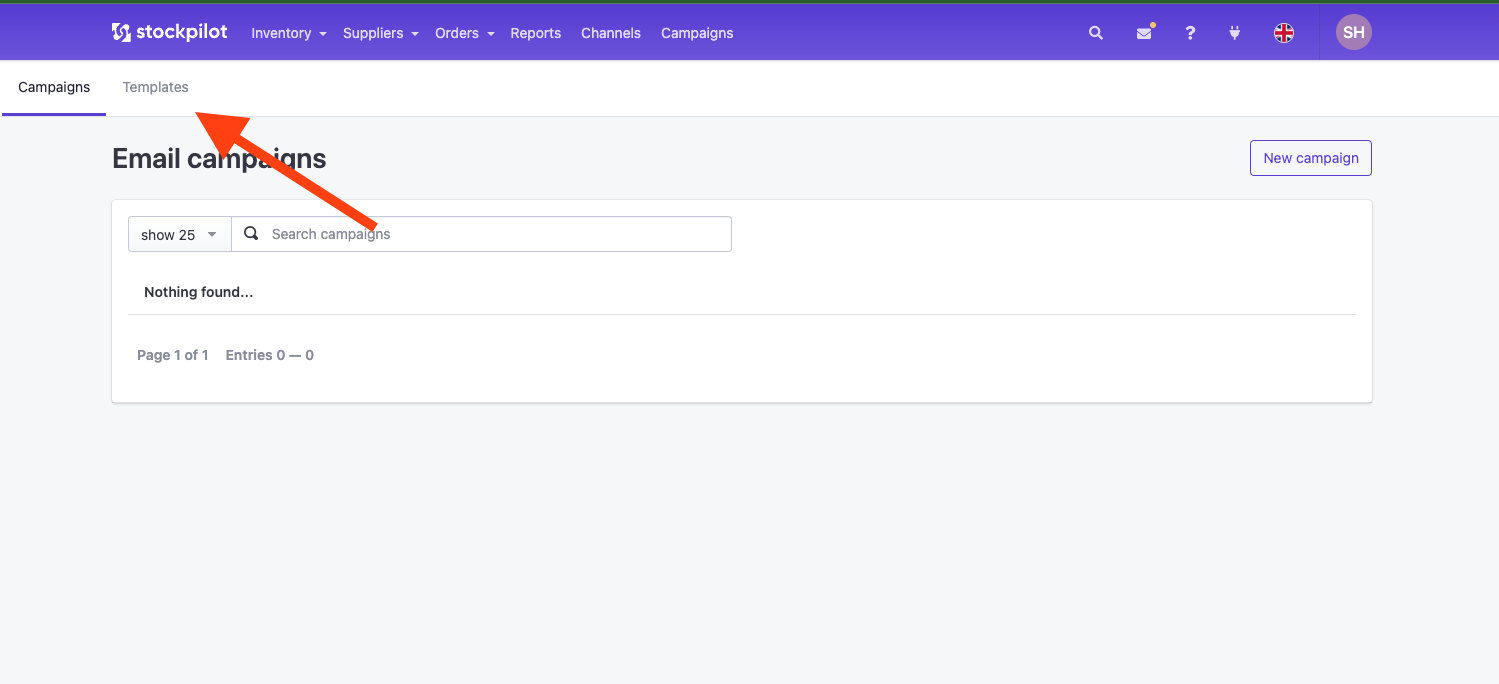
To get started, simply click on the "Campaigns" item in your menu bar. After this, select "Templates" which is situated just below the menu bar to explore and utilize the available email templates for your campaign.
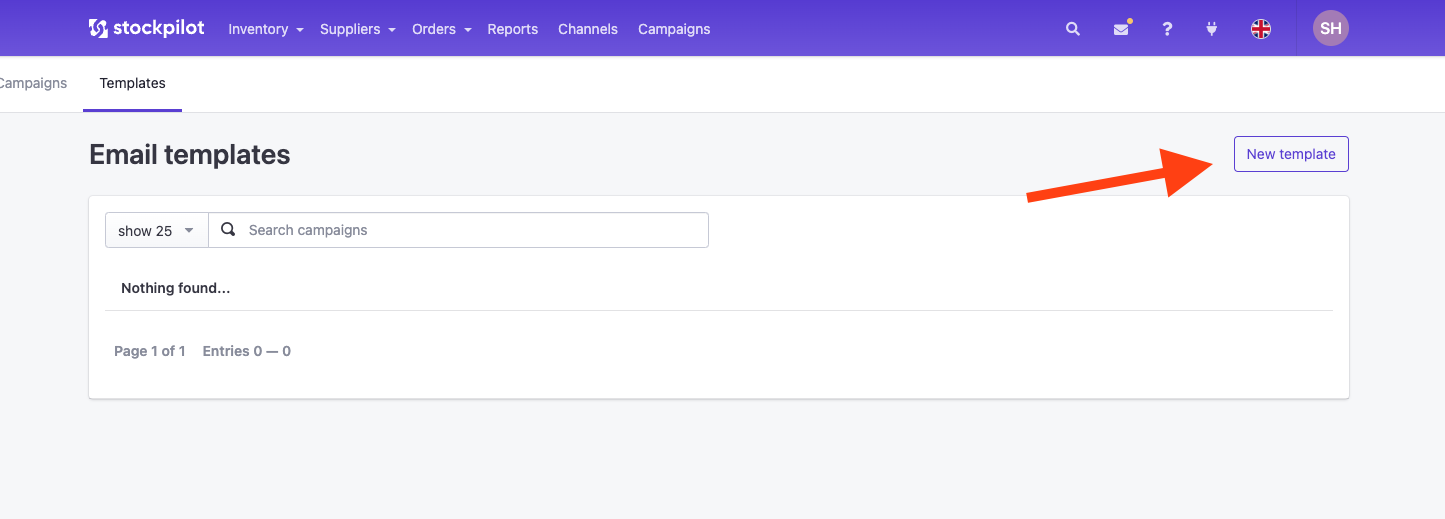
Next, to create your first template, click on the "New Template" button, which you'll find on the right side of the screen. This will initiate the process for crafting a new email template for your campaign.
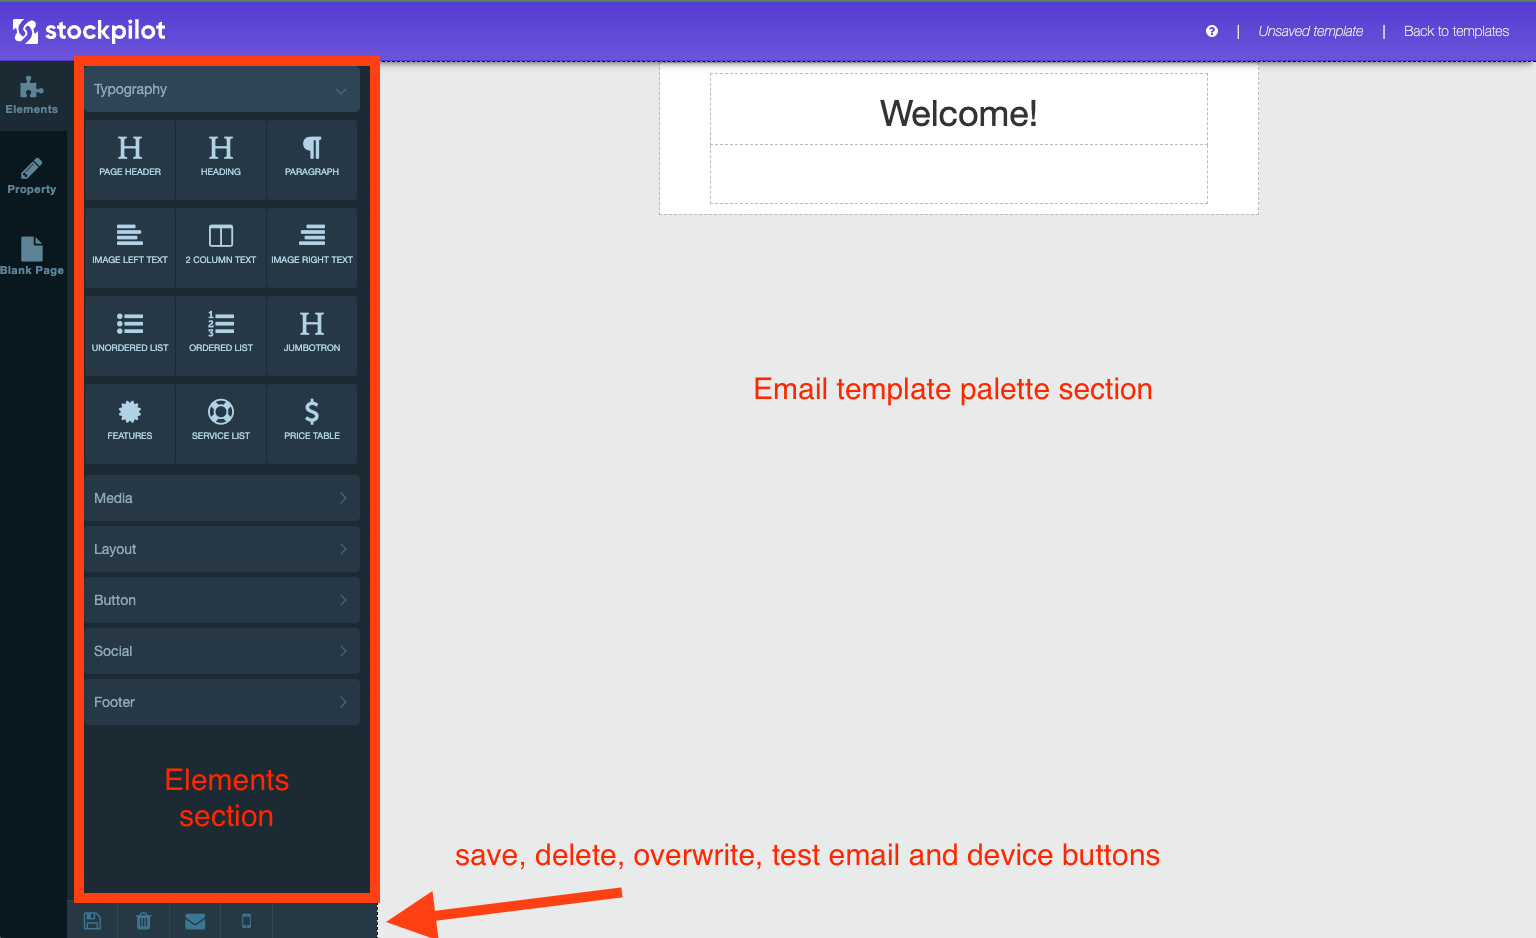
Upon clicking the "New Template" button, you will be taken to the email template builder. This intuitive drag-and-drop tool features a selection of elements on the left, with your working palette on the right.
In the lower left corner of the screen, you'll find key controls including options to save or delete your work, overwrite existing templates, send a test email, and preview your template on different devices.
This article provides an in-depth explanation of the email template builder tool. It covers all the functionalities and features you need to know to effectively create and manage your email templates using this intuitive drag-and-drop interface.
For this example we drag an element to the palette below the Welcome header.

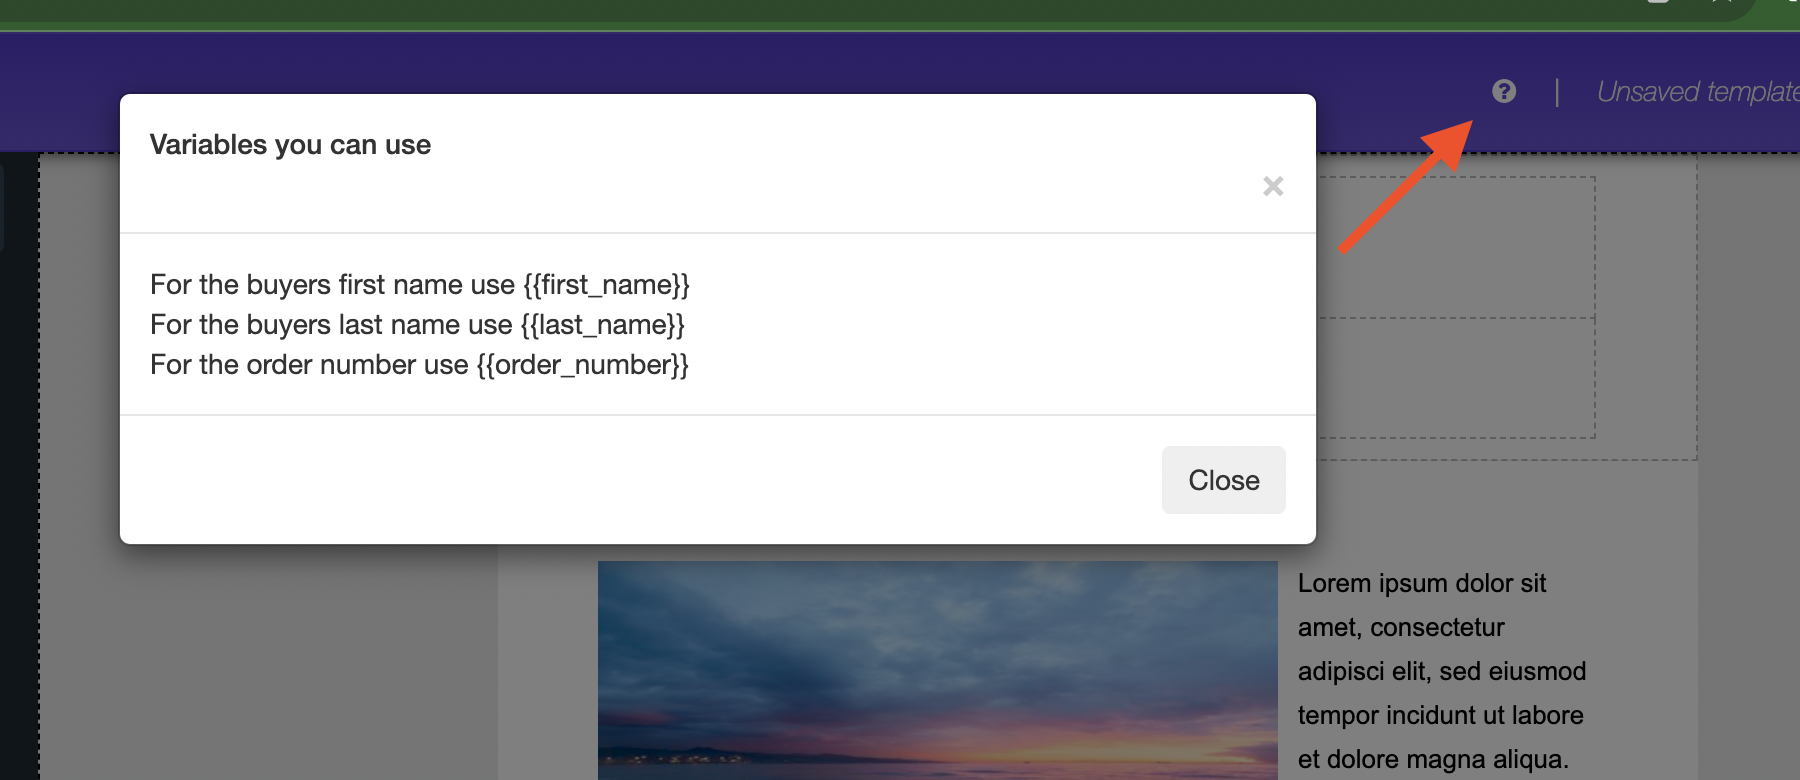
If you click on the ? icon a popup appears showing you variables you can use in the text of the template.
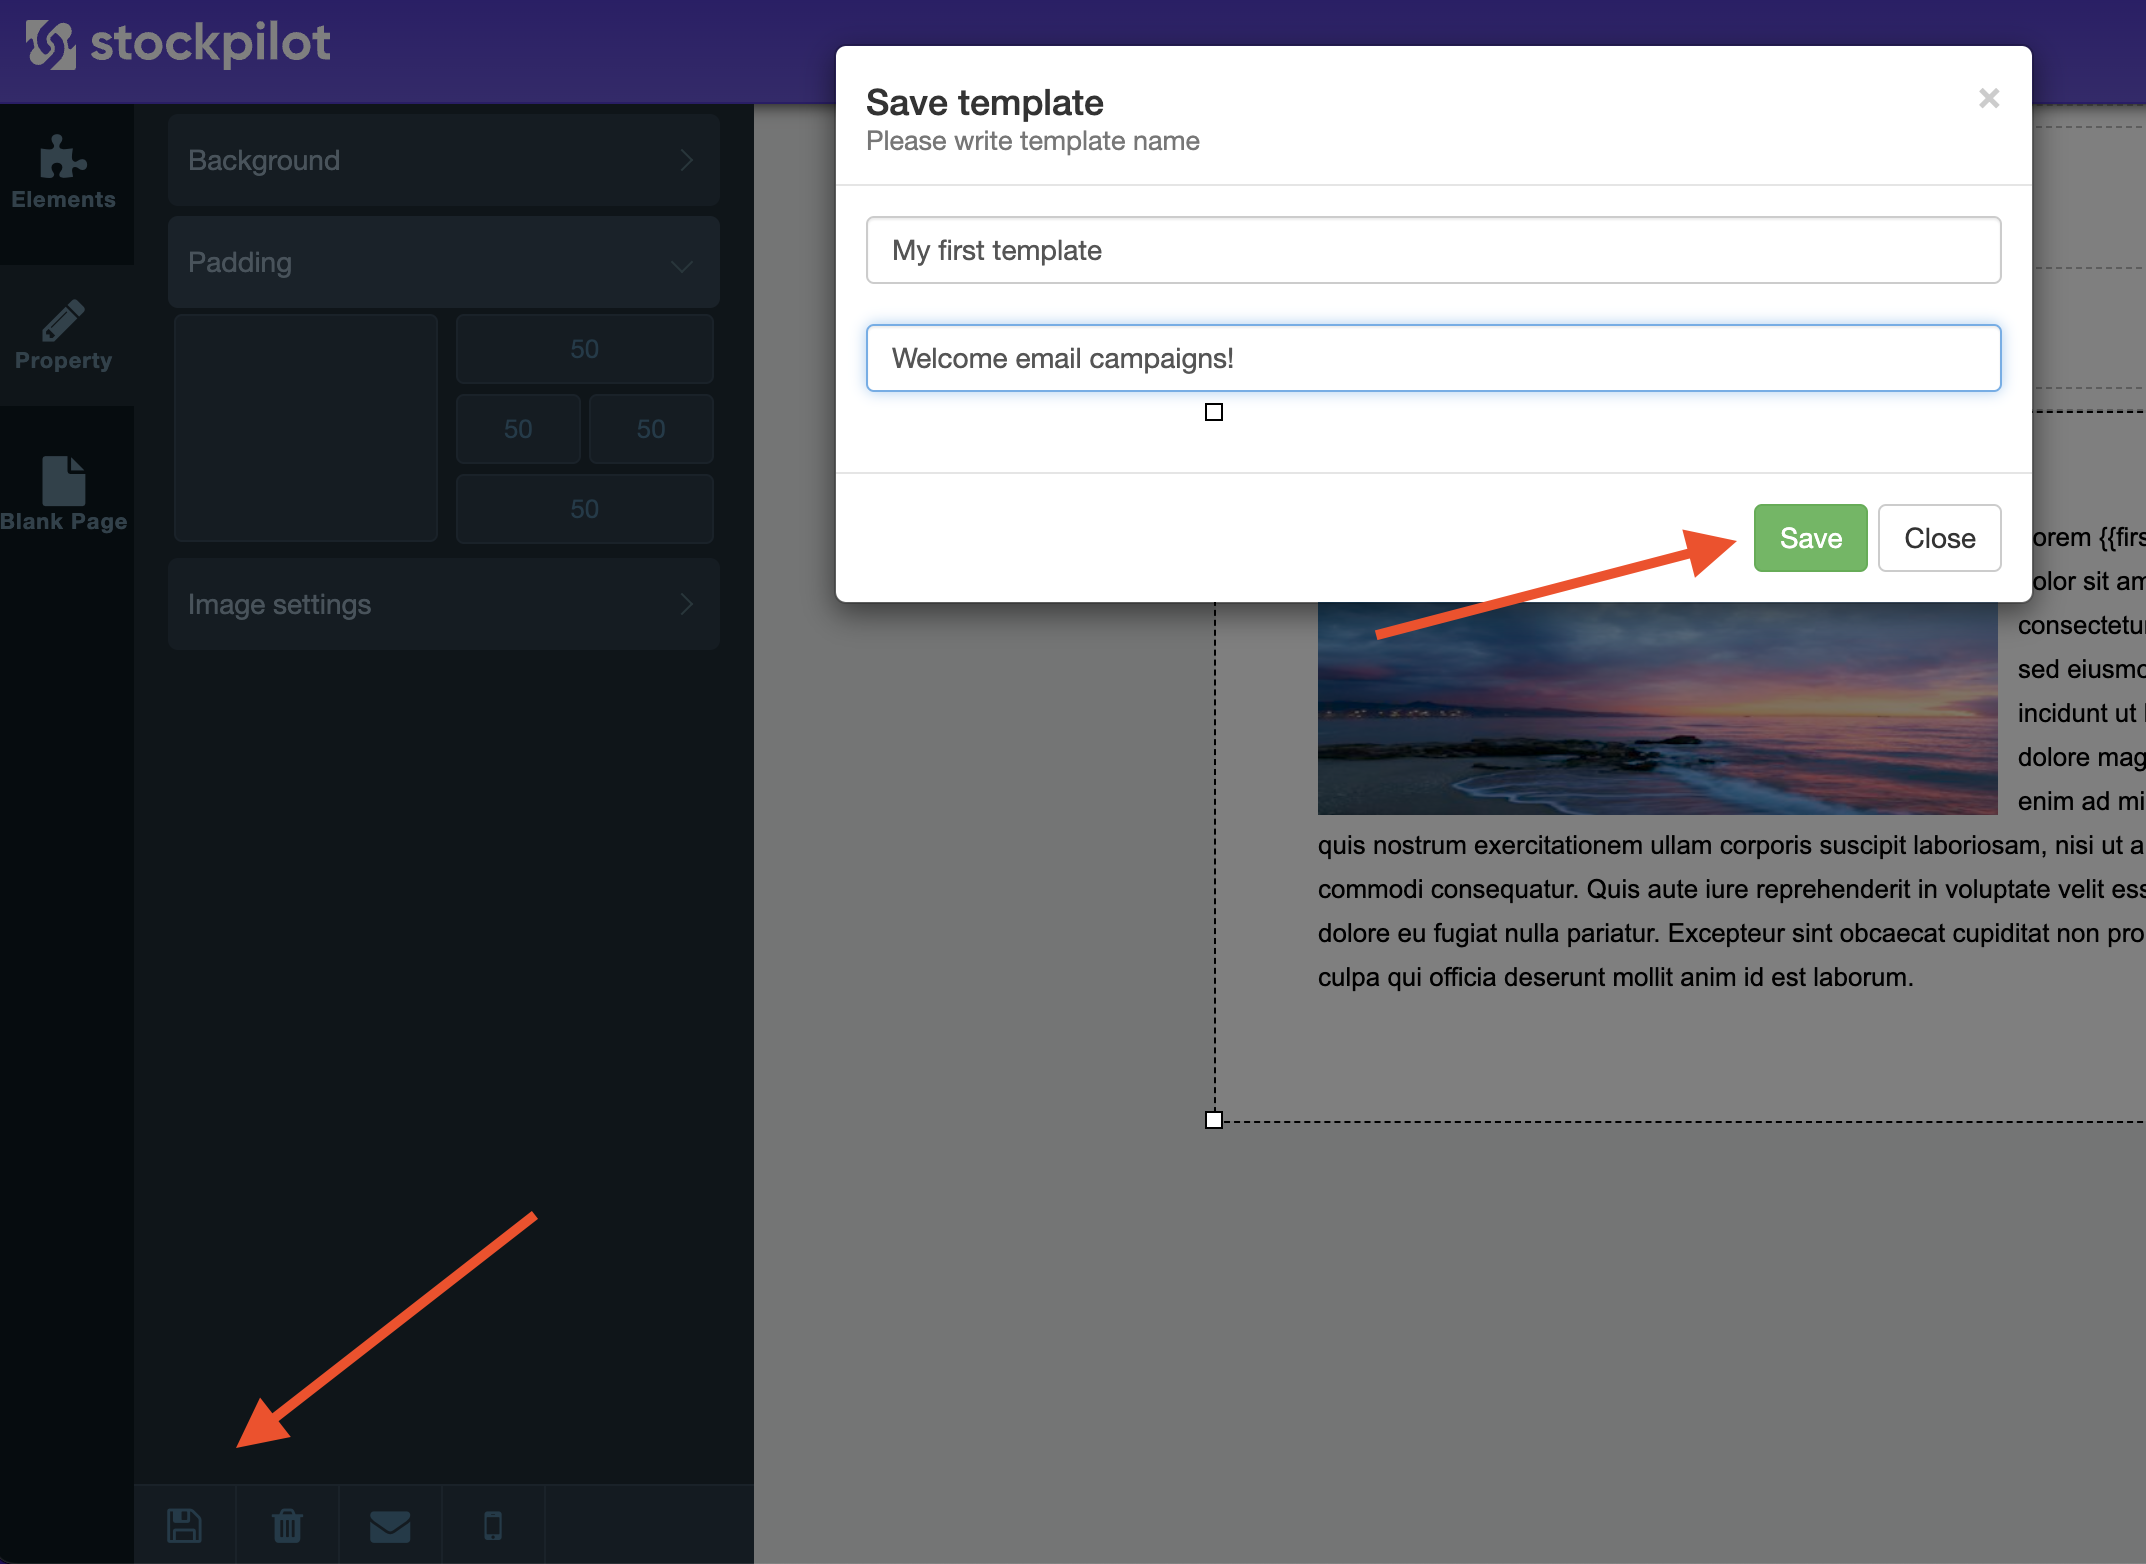
Now, after finalizing your template, click the save icon. A popup will appear, prompting you to assign a name to your template and set a subject for the email. Once you've entered this information, click 'Save' to store your newly created template.
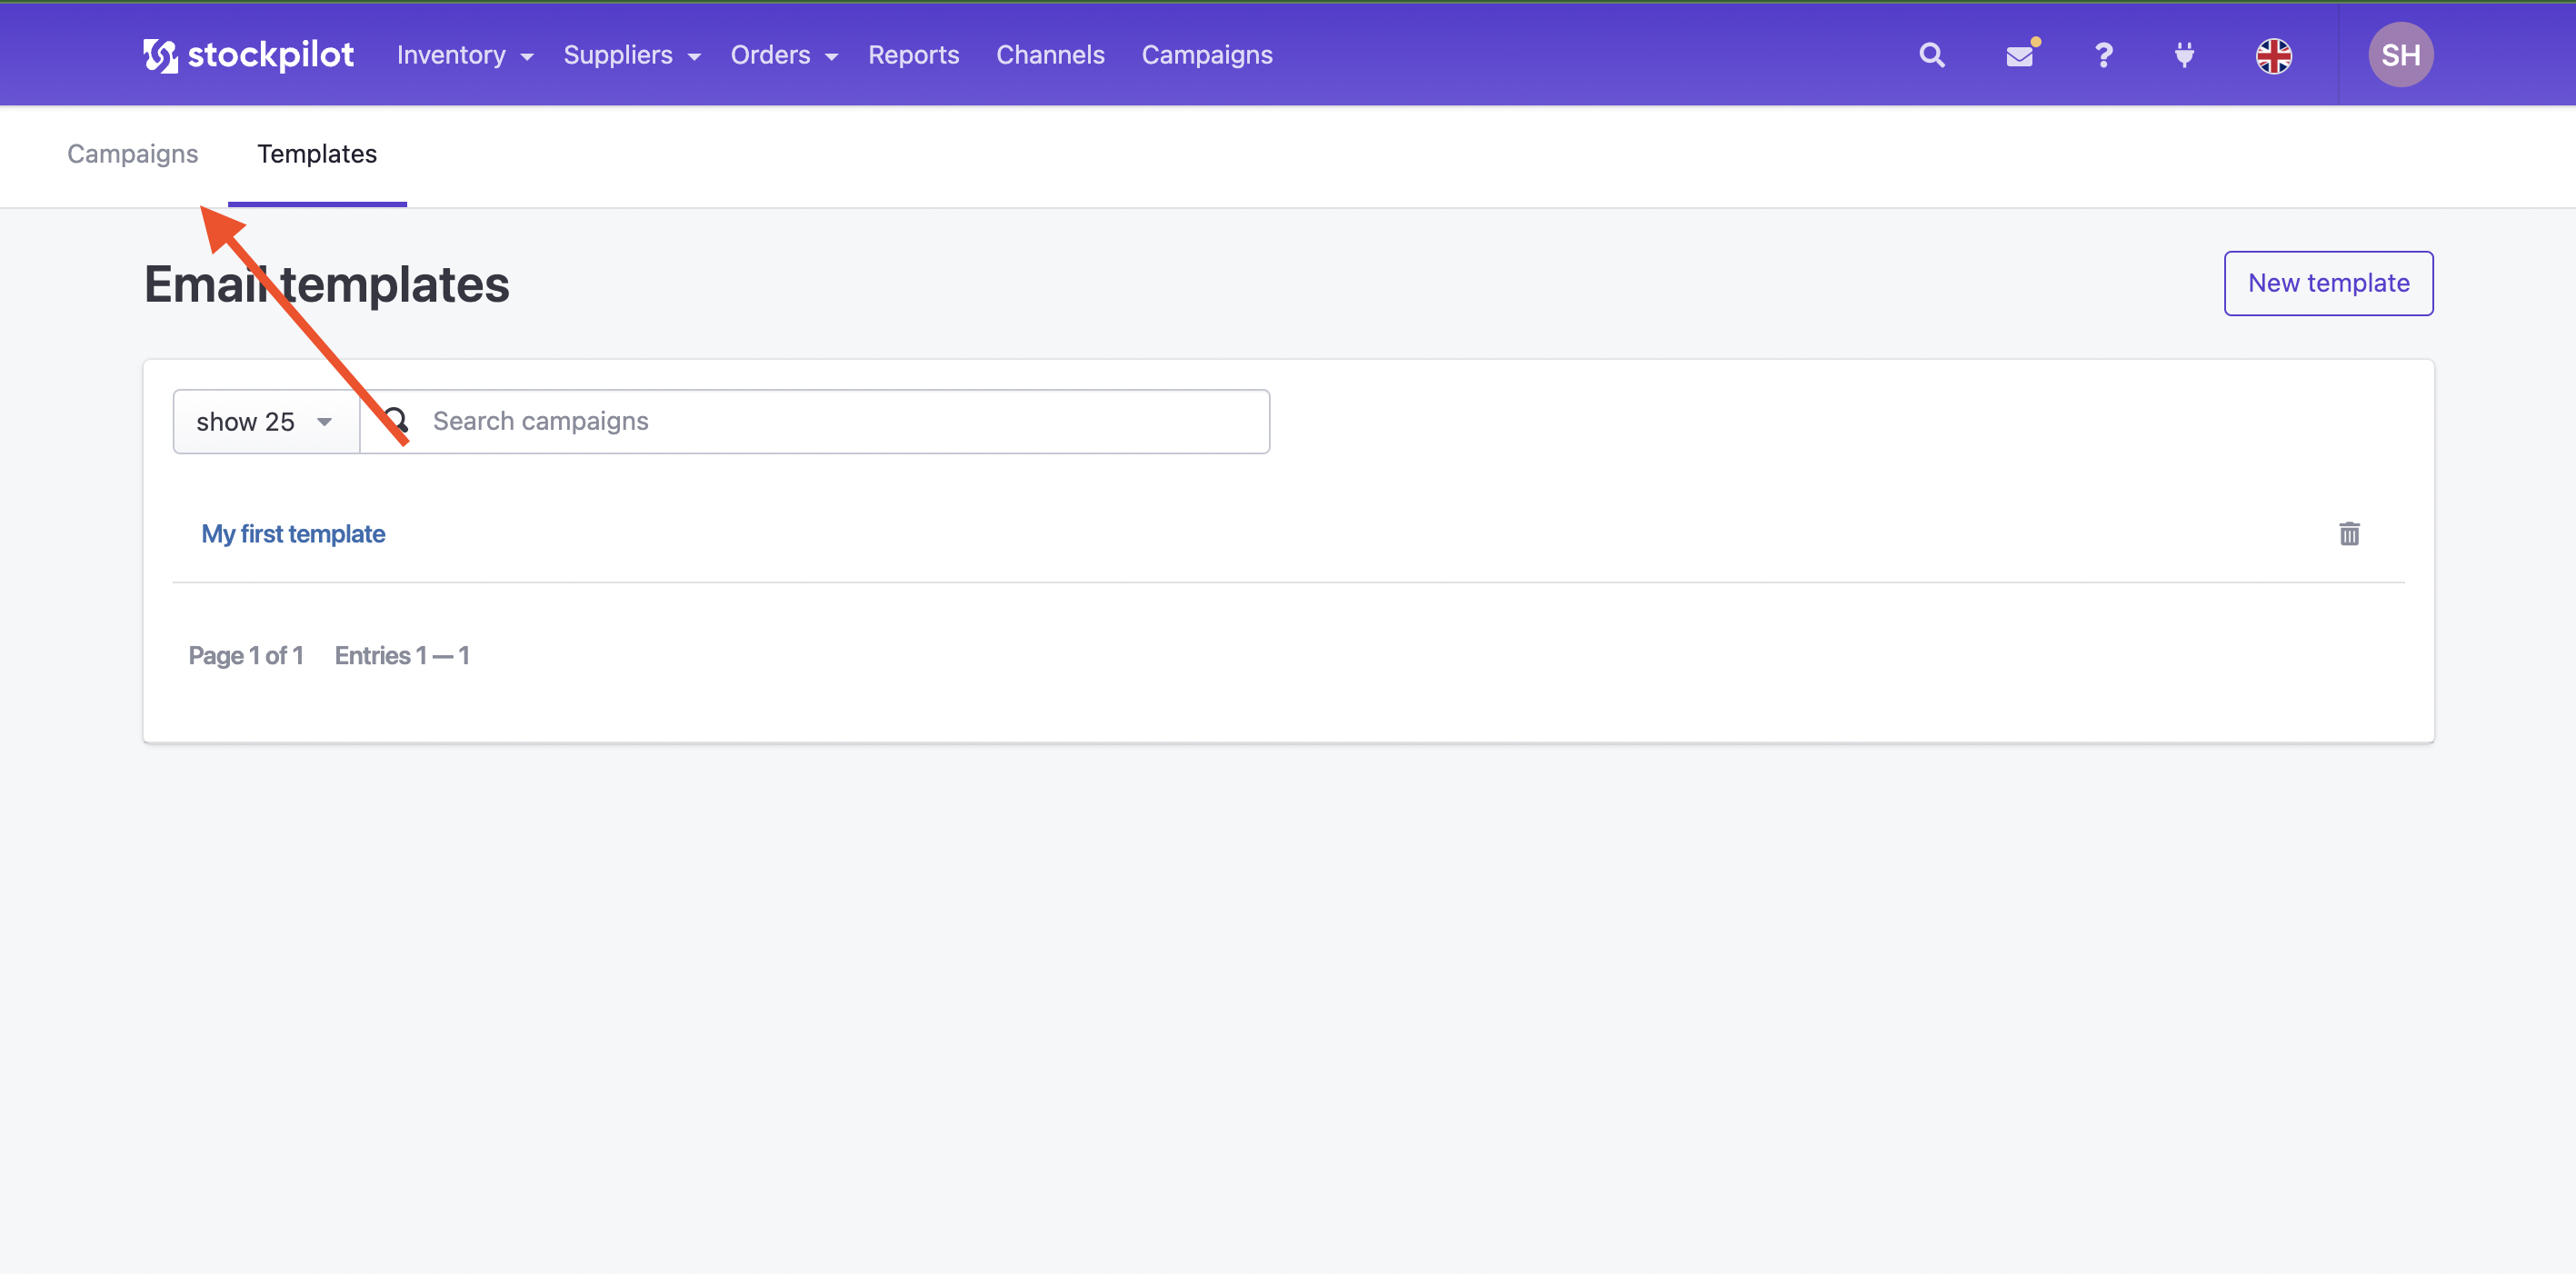
In the top right corner of the screen, you can click on "Back to Templates." This action will redirect you to the templates overview page, where you will see the template you just created. On the right side of your template's listing, there is a trash icon; this can be used to delete the template if needed. From this overview page, you can then navigate to "Campaigns" to start creating your first email campaign.
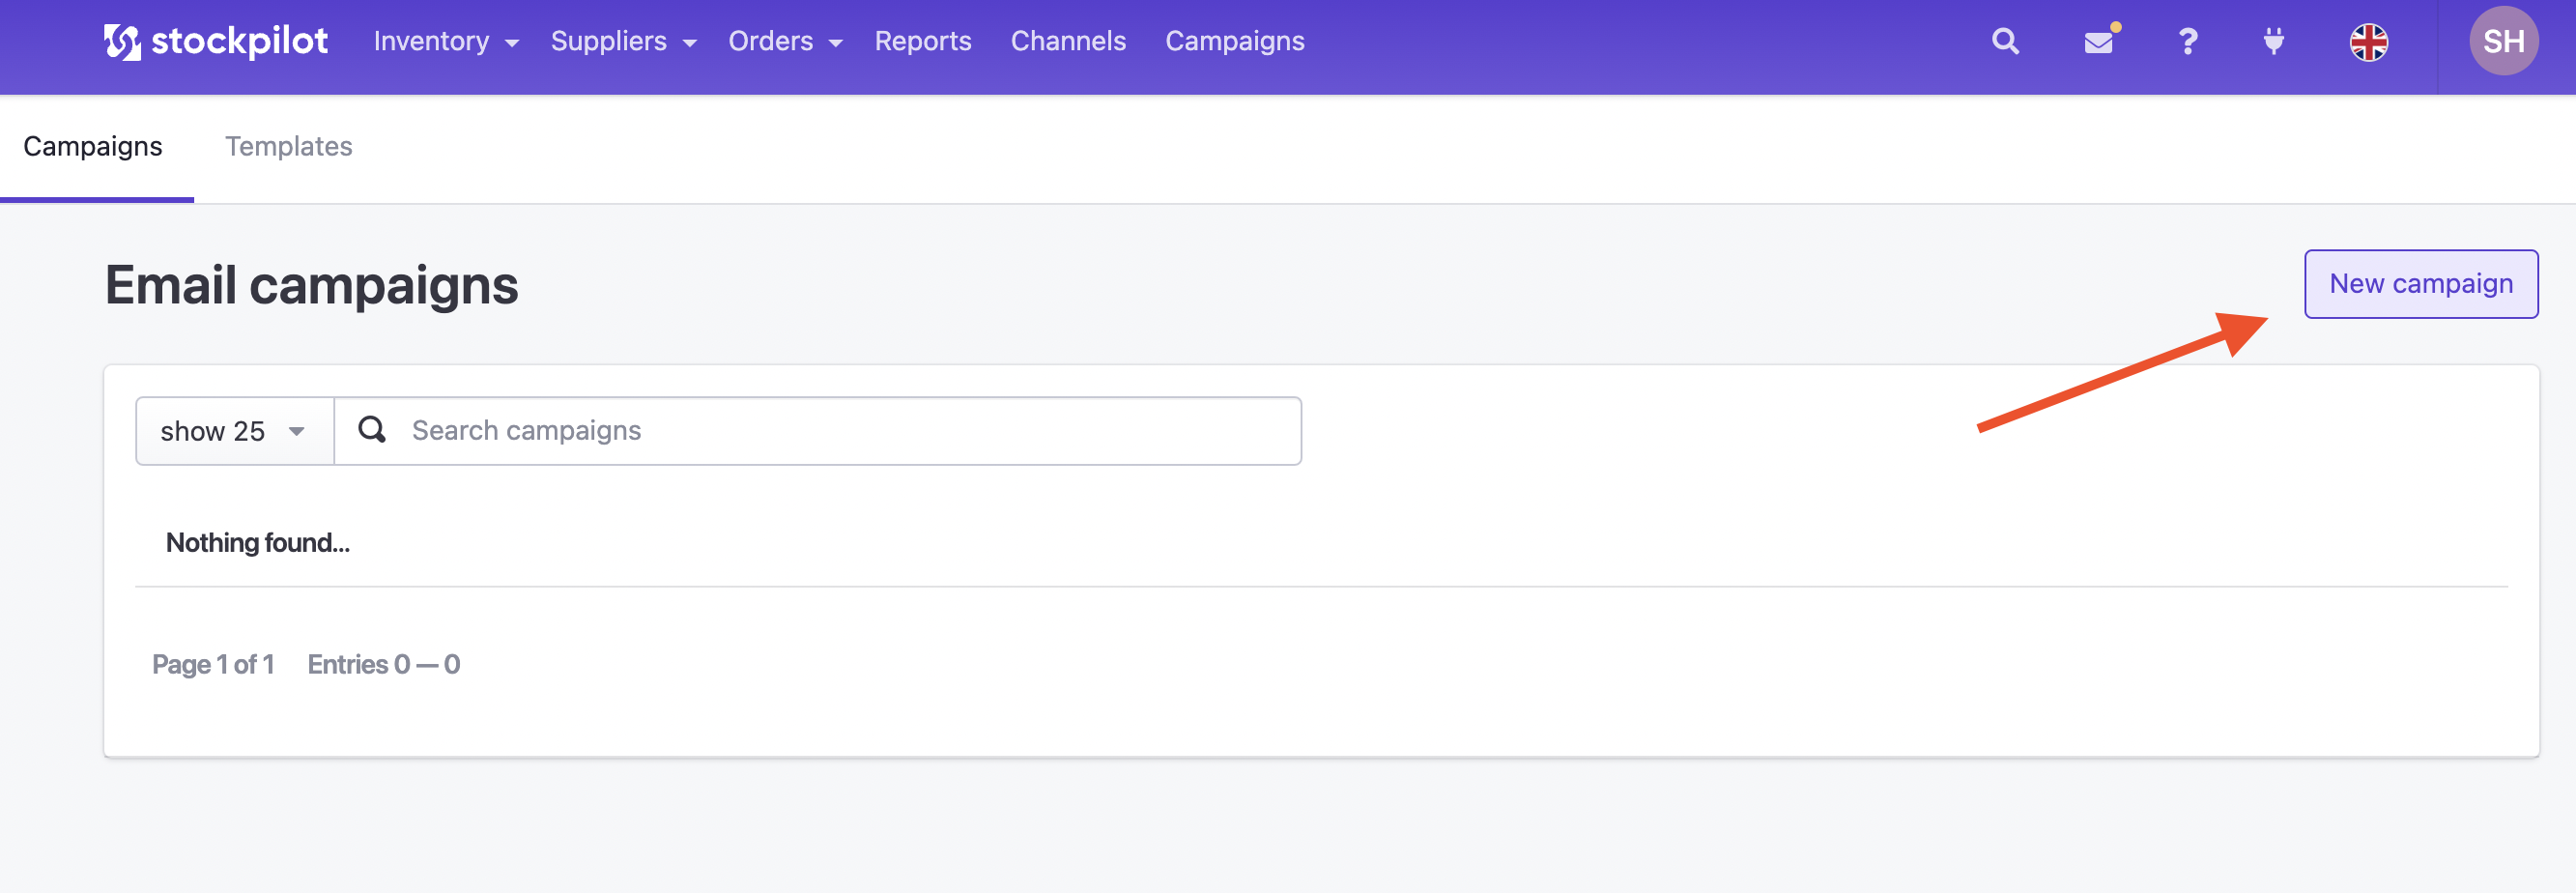
Next, to initiate the creation of your first campaign, click on the "New Campaign" button. This will start the process for setting up and customizing your email campaign.
First, give your campaign a name in the designated field. Once you've named your campaign, click on the "Create Campaign" button located in the top right corner to proceed with its creation.

Now that your campaign is created, the next step is to add templates to it. To do this, click on the "Add Template" button. This will allow you to search for and select the template you wish to add to your campaign.
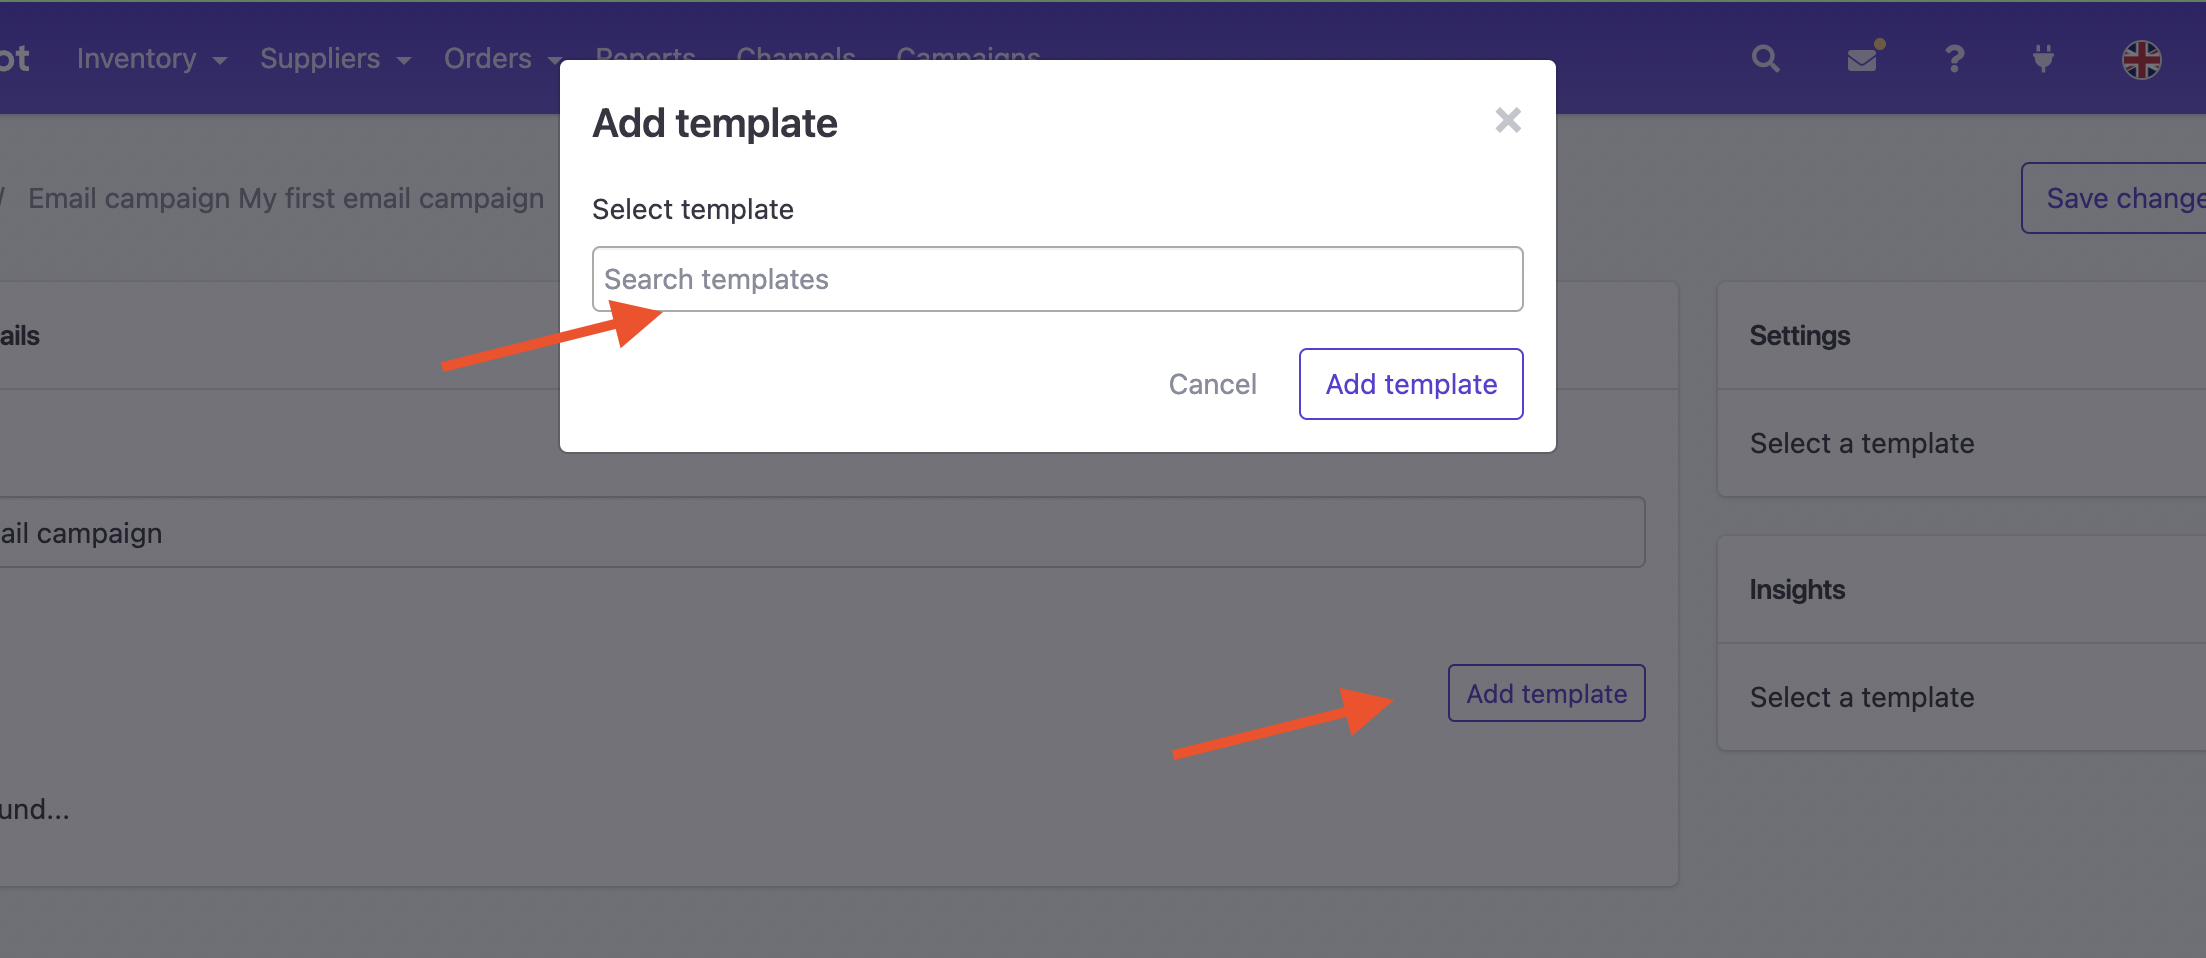
After adding your first template, it will appear under the "Templates" section of your campaign. When you click on this template row, its settings will become visible on the right side, allowing you to configure and customize the template as per your campaign requirements.
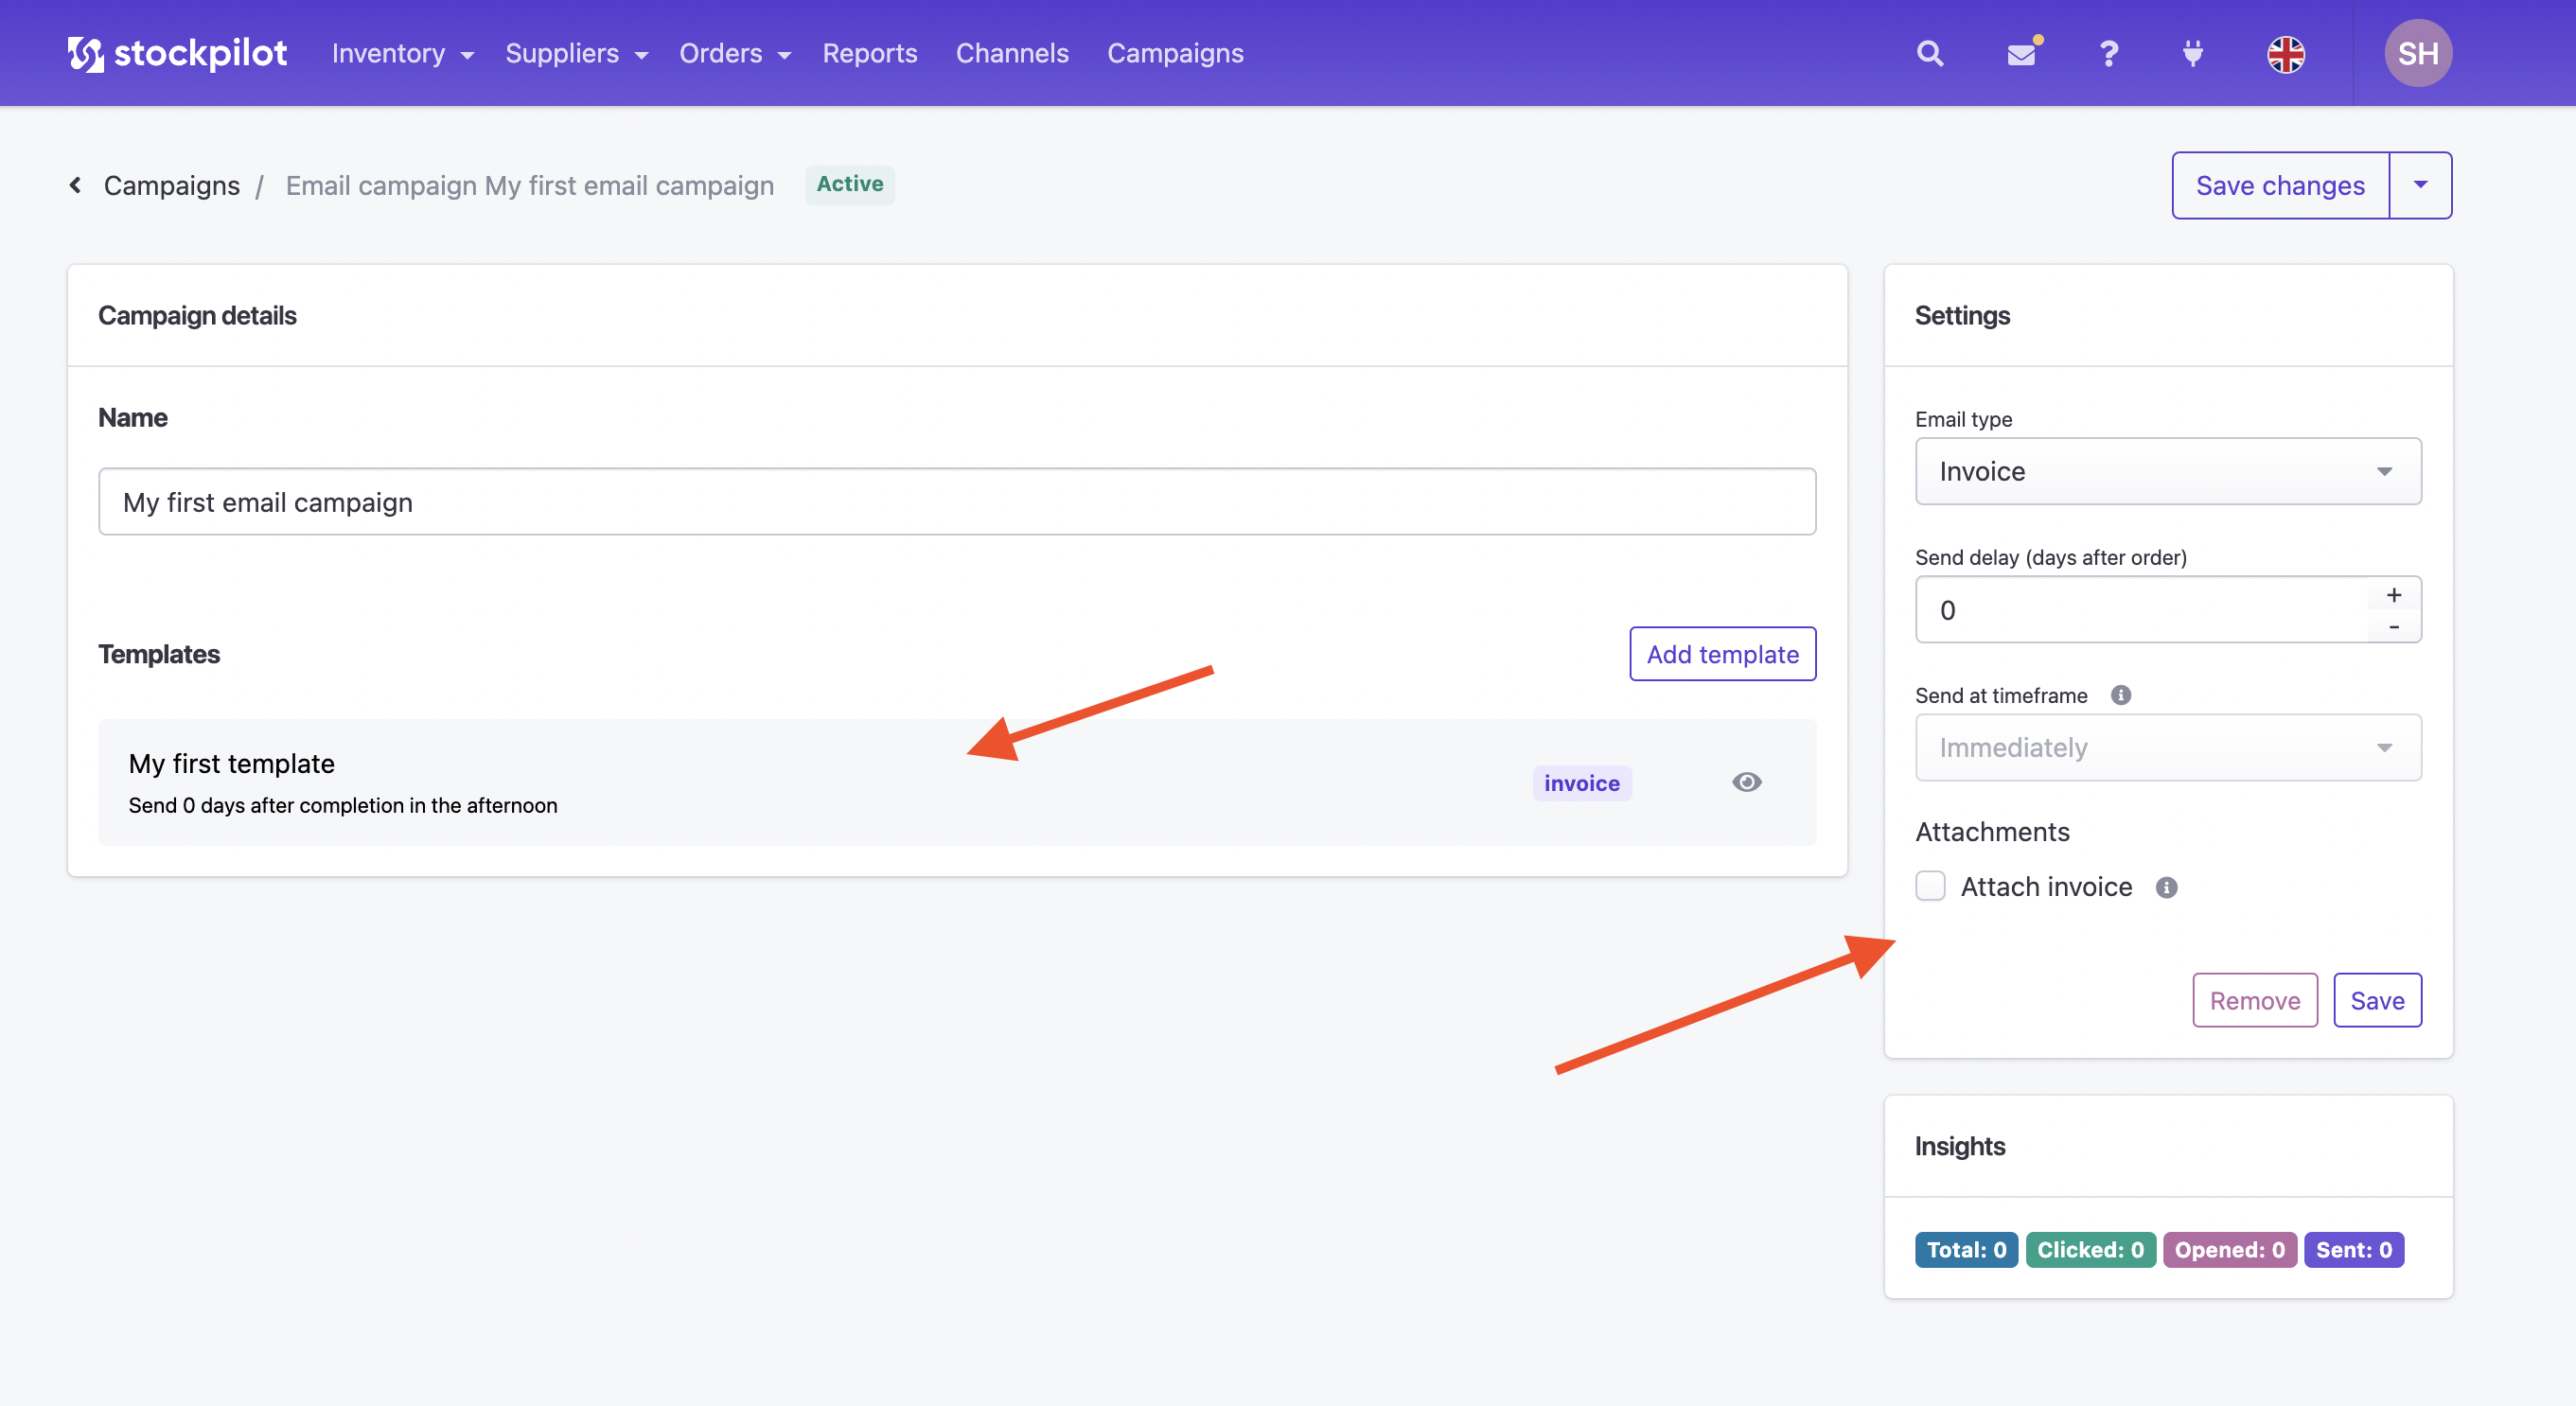
In the settings for your template, the first option is "Email Type," which serves as an internal tag to categorize and manage your emails.
The second setting is the "Send Delay" after an order is completed. By setting this to 1 or more days, you unlock an editable section where you can specify the exact timeframe for sending the email.
The final setting allows for the attachment of an invoice to the email. However, it's important to note that attaching invoices is not permitted on certain marketplaces, such as bol.com, so be sure to adhere to marketplace-specific guidelines when using this feature.
3. Adding Campaigns to Listings:
After creating your campaign, the next step is to effectively integrate it with your listings. This part of the guide demonstrates how to link your newly created email campaign to your chosen listings for enhanced visibility and engagement:
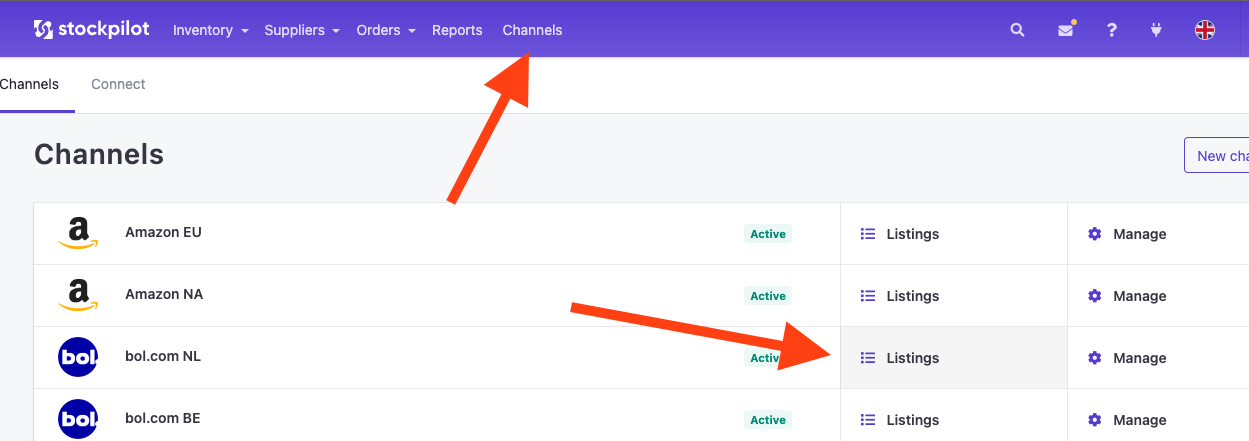
To assign your email campaign to a specific channel, start by navigating to the "Channels" section in the top menu bar. Once there, click on "Listings" next to the channel where you want to implement your email campaign. This will direct you to the relevant channel's listings area.
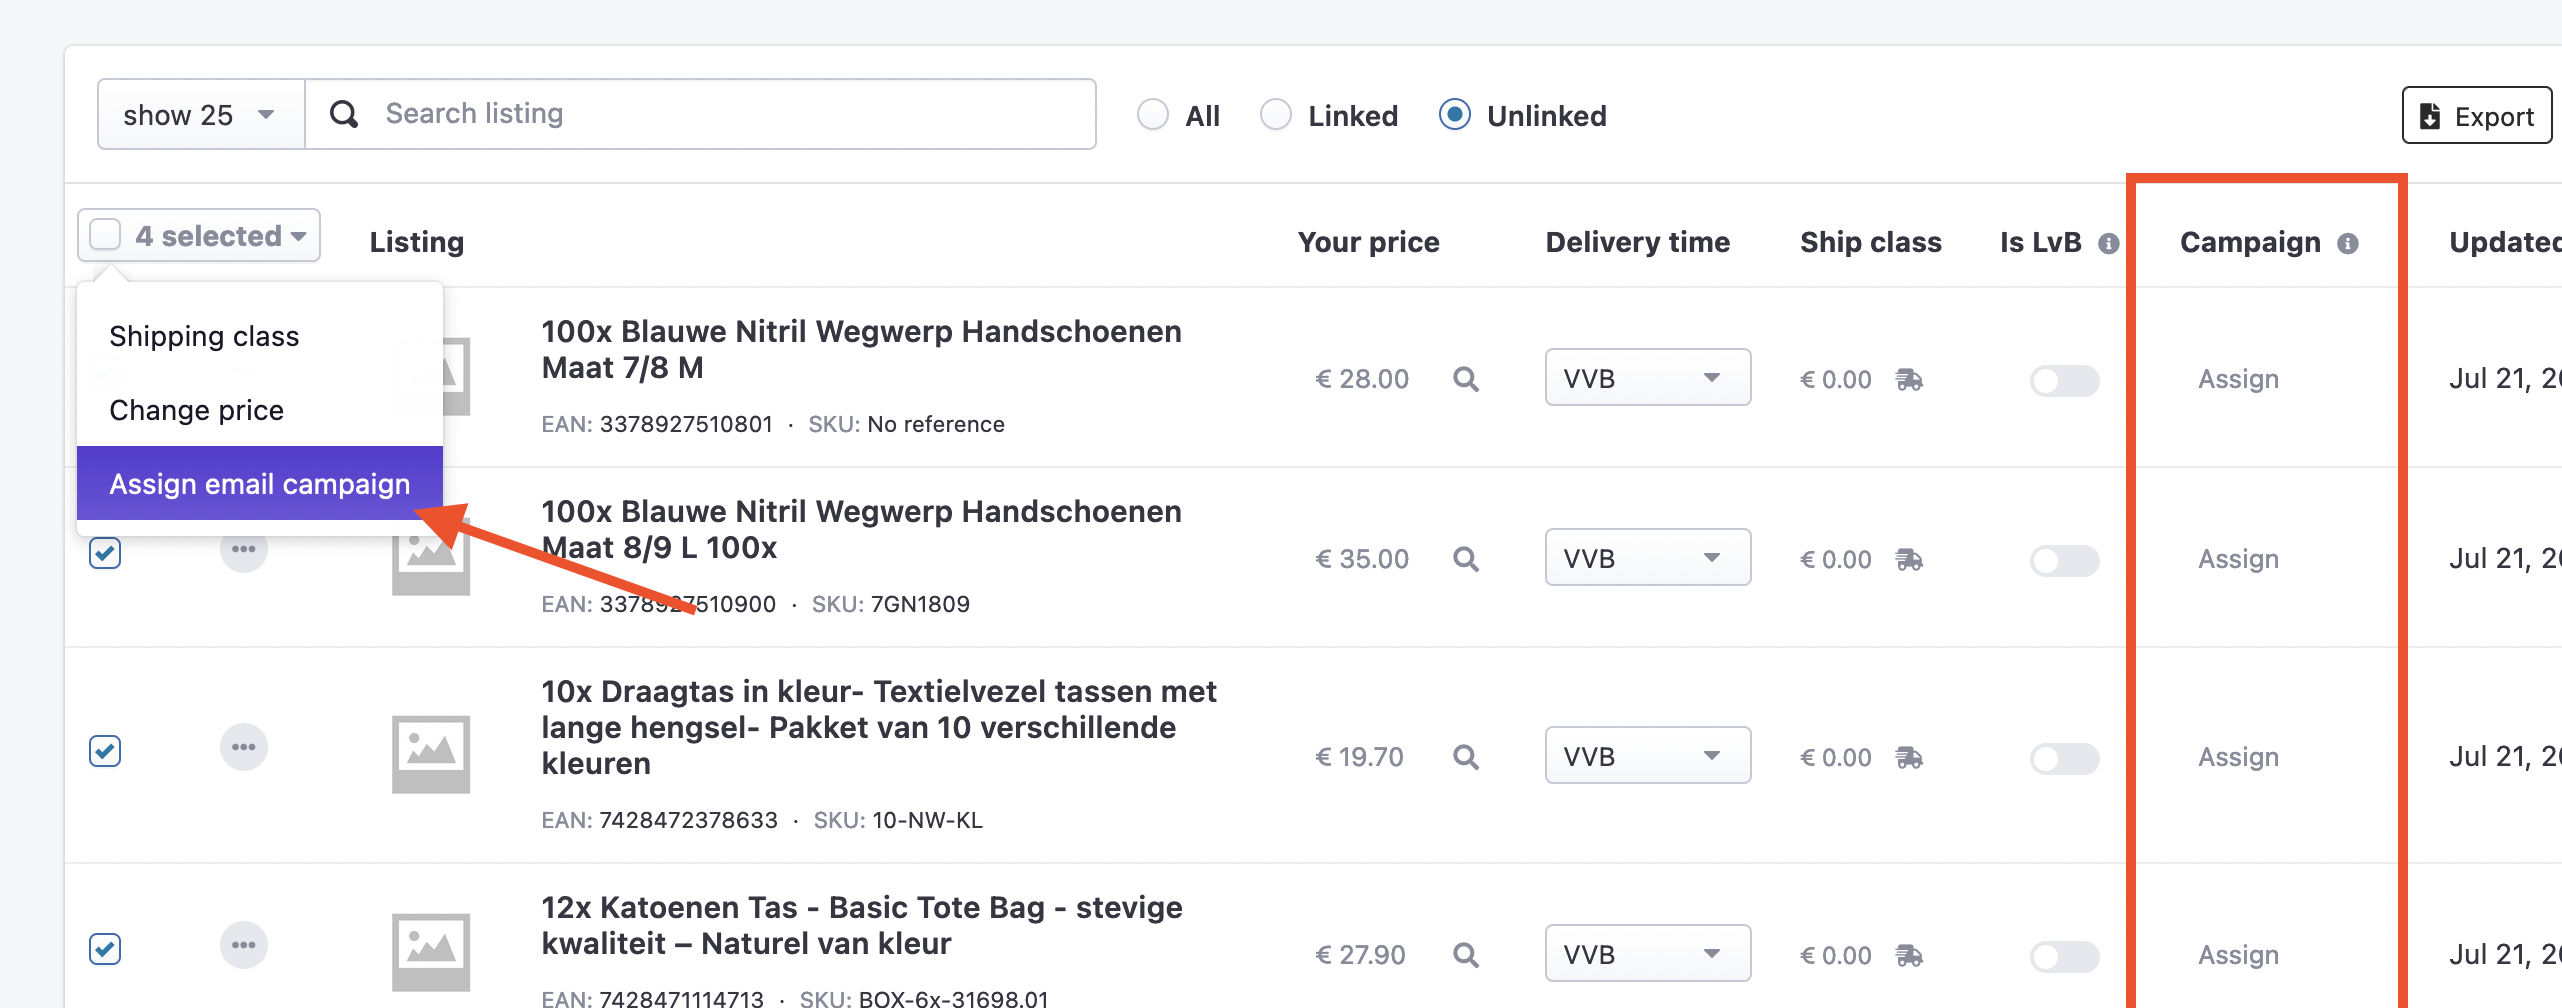
With the Email Campaign Manager installed, an additional column will now be visible in the listings overview. In this new column, you will find an "Assign" button for each listing. Clicking on this button allows you to assign an email campaingn to the respective listing individually.
Alternatively, if you want to assign a campaign to multiple listings at once, you can do so in bulk. Simply select the checkboxes next to the listings you want to include, and then choose "Assign Email Campaign" from the dropdown menu. This bulk action facilitates efficient and quick assignment of your email campaign to multiple listings.
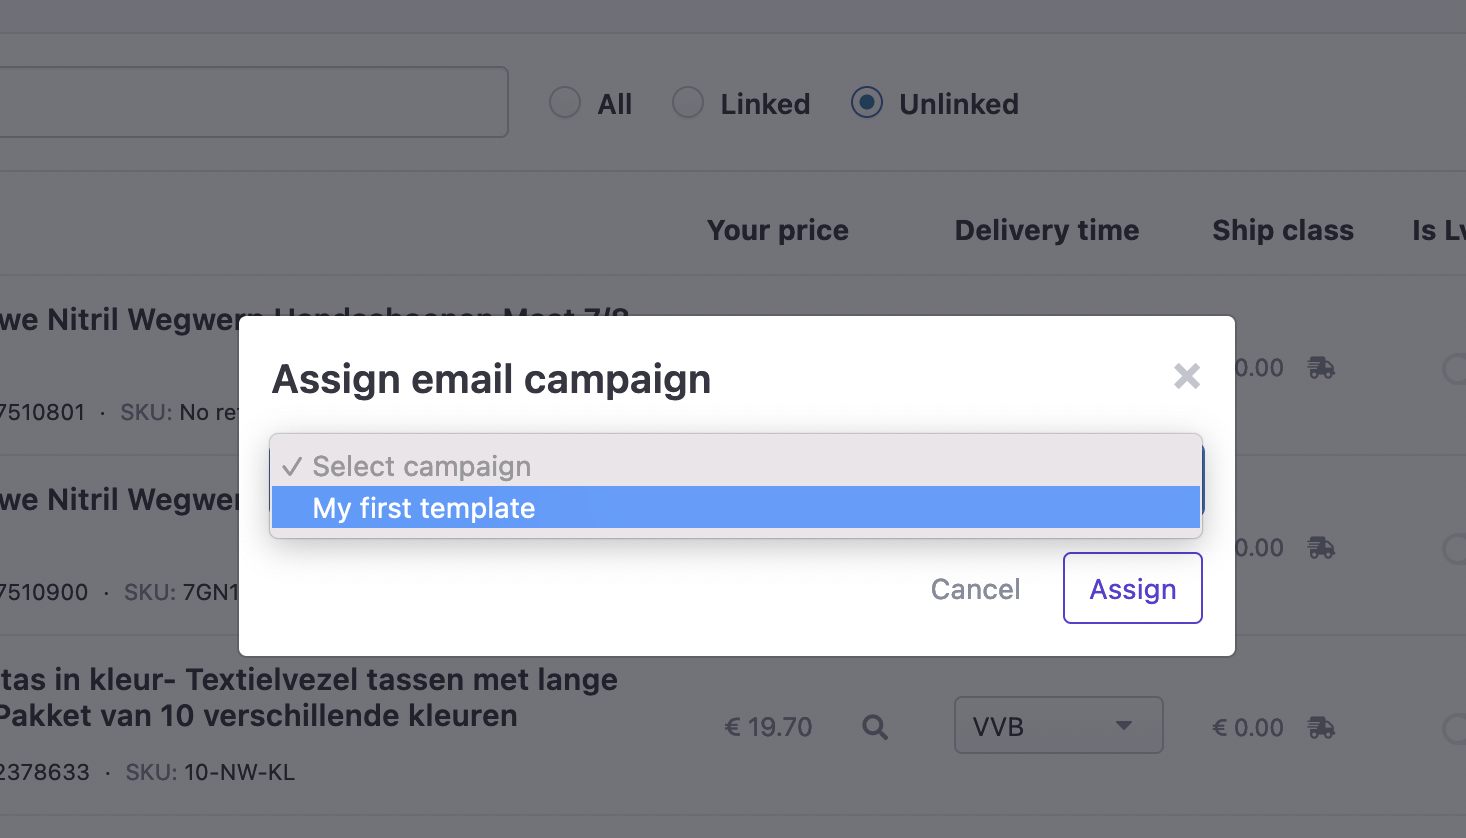
To assign a campaign to a listing, click on one of the "Assign" buttons corresponding to your desired listing. In the popup that appears, select the campaign you wish to use. Once you have chosen the appropriate template, click the "Assign" button within the popup to complete the assignment process for that specific listing.
After assigning the campaign to a listing, you'll notice that the campaign becomes visible in the listings overview, represented as a clickable button. By clicking on this button, you can navigate directly to the campaign. Additionally, when you hover over the campaign button, a trash icon will appear. Clicking on this icon allows you to unassign the campaign from that particular listing, offering flexibility in managing your email campaigns across different listings.

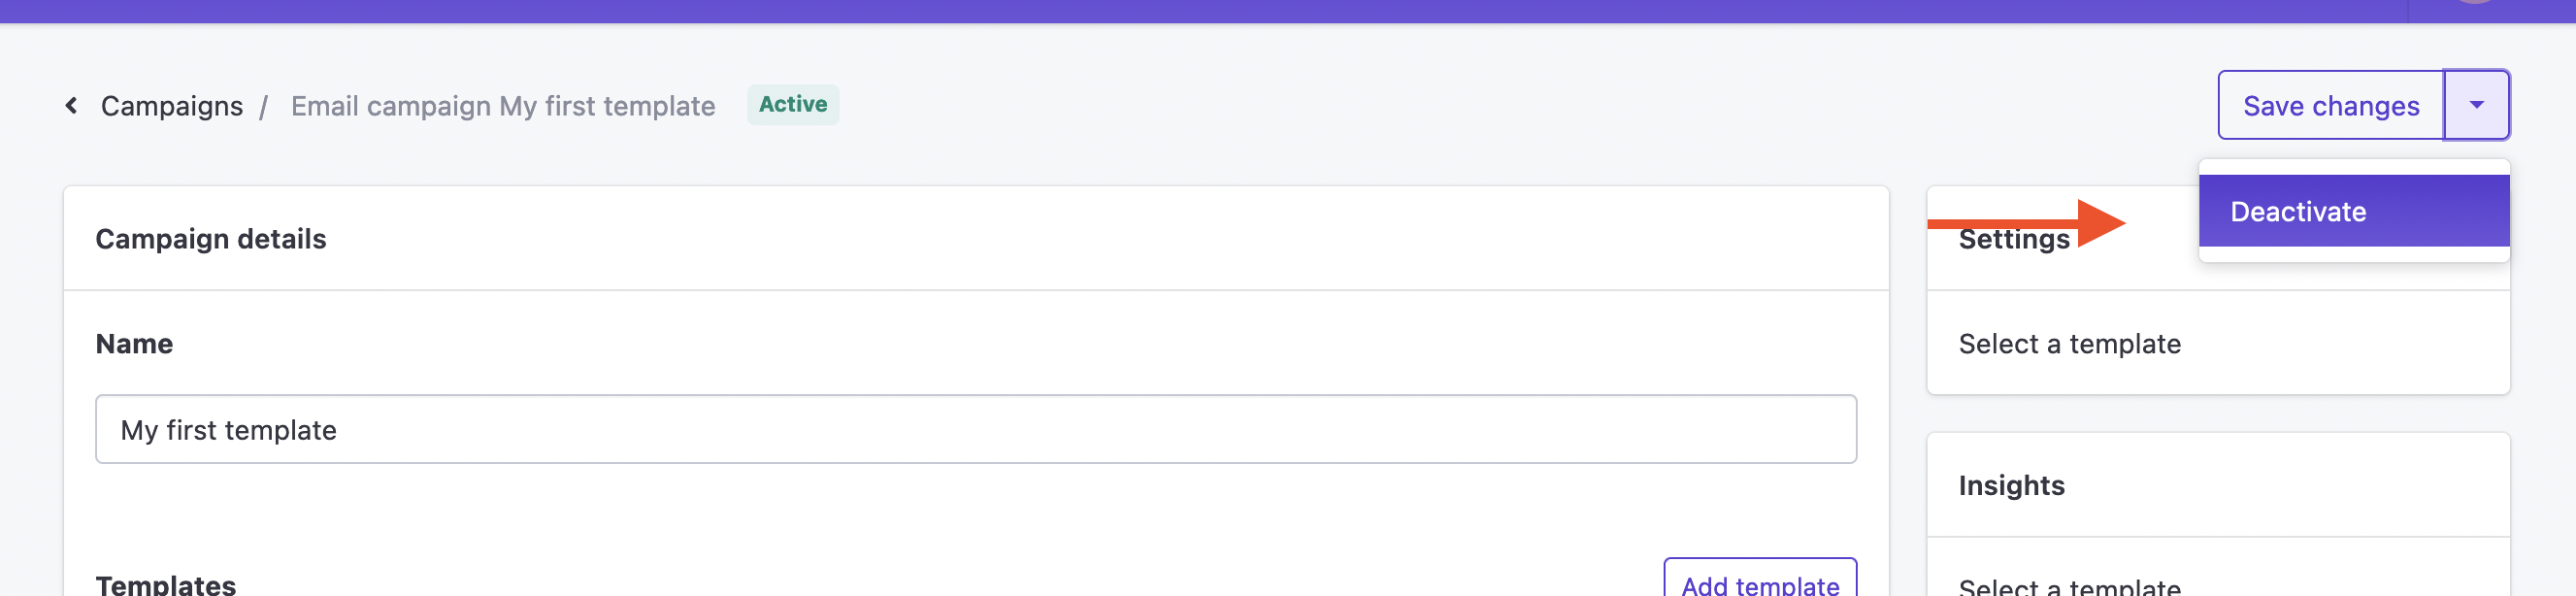
Every time a sale occurs for this assigned listing and the order status is completed, the campaign will automatically be activated and the associated email template(s) will be sent according to your settings. If at any point you wish to pause the campaign for this listing, you have the option to deactivate it. This can be done by clicking on the dropdown menu for the listing and selecting "Deactivate." This action will temporarily halt the campaign until you choose to reactivate it.
Finally you can see the stats of any campaign on the campaign detail page and you can see the stats on an order base when you click the specific order after it has been completed.
Additional Resources:
- For an in-depth exploration of assembling and designing emails, visit our comprehensive editor guide here.
- Familiarize yourself with the rules and best practices of using our Email Campaign Manager by visiting this page.
Conclusion:
With this guide, we aim to provide you with a clear and easy-to-follow pathway to mastering the Email Campaign Manager Add-On. For any further assistance or queries, feel free to reach out to our support team.