How to use shipping label templates
 Updated
Often, finding yourself applying identical shipping labels repeatedly can be a cumbersome task, leading to unnecessary mouse clicks and time consumption. To alleviate this challenge, Stockpilot offers a valuable solution: the ability to craft label templates. This feature not only simplifies the process of categorising various tasks and items, but also significantly enhances overall workflow efficiency and organisation.
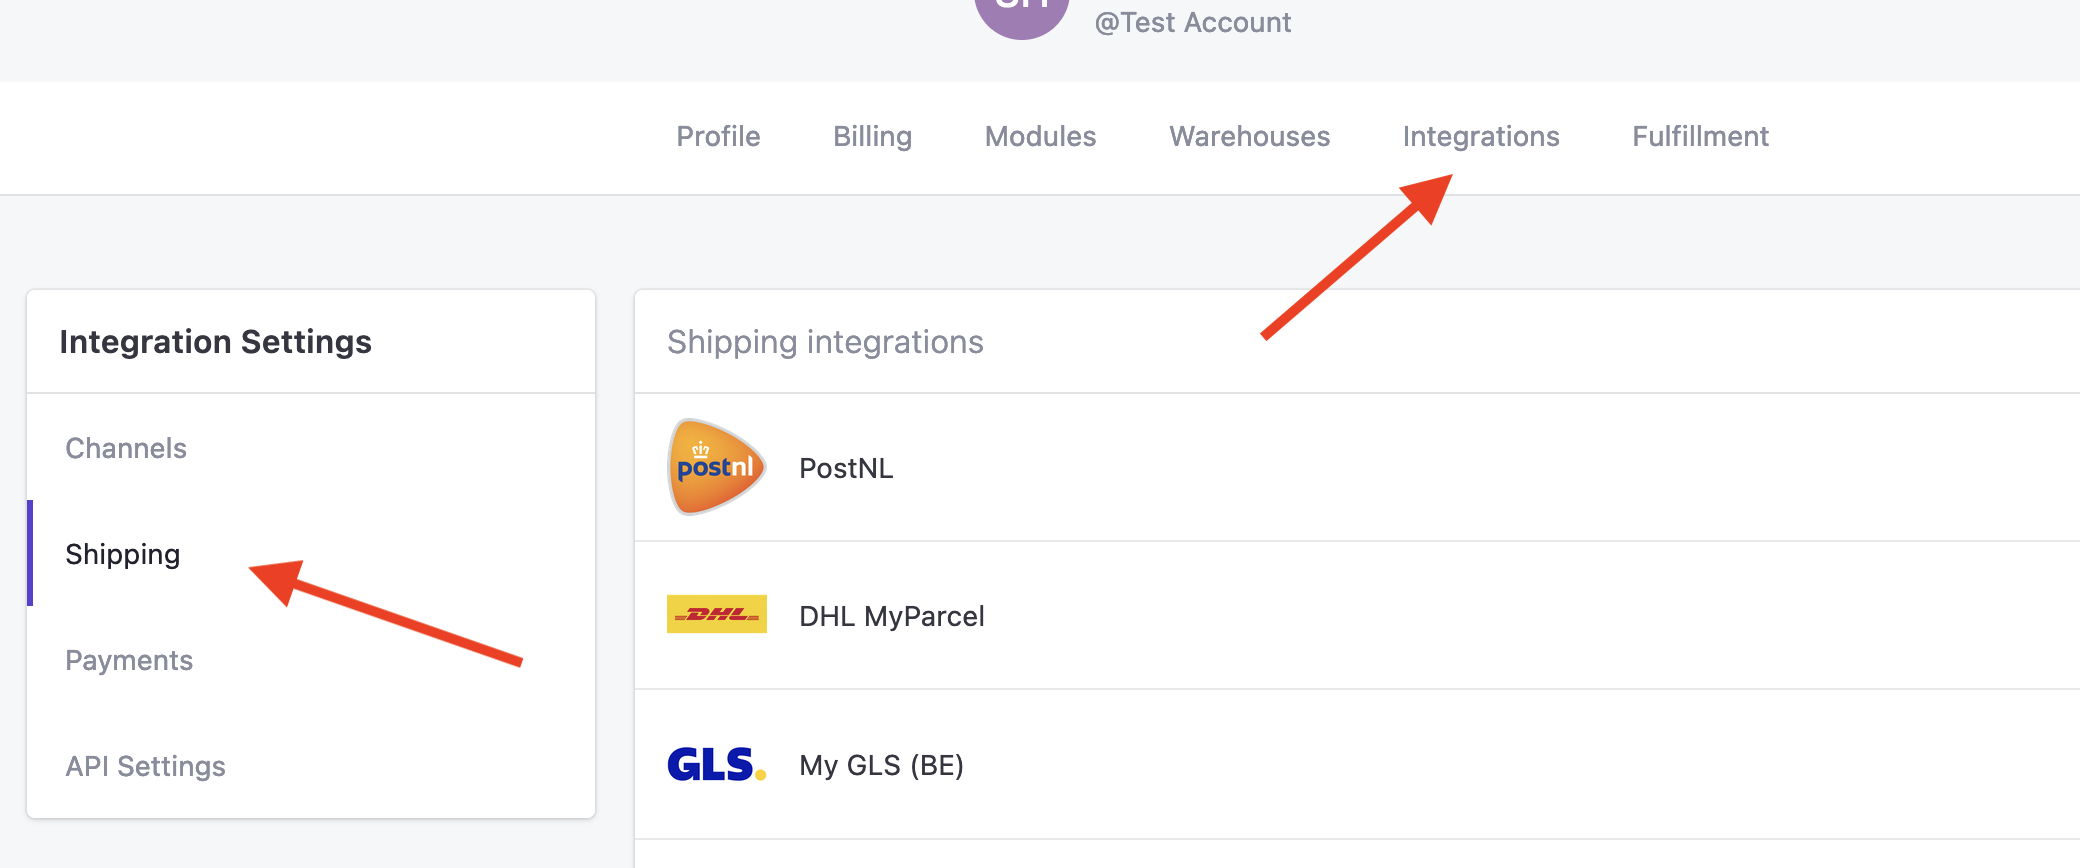
To create your first label template navigate to Account info in top menu bar.

Next you navigate to Integrations > Shipping and here we click on the integrated shipping carrier.
On the next page you can click the New template button and in the popup you fill out a template name, shipping country and the specific labeling options. Once everything is filled out you click Create.
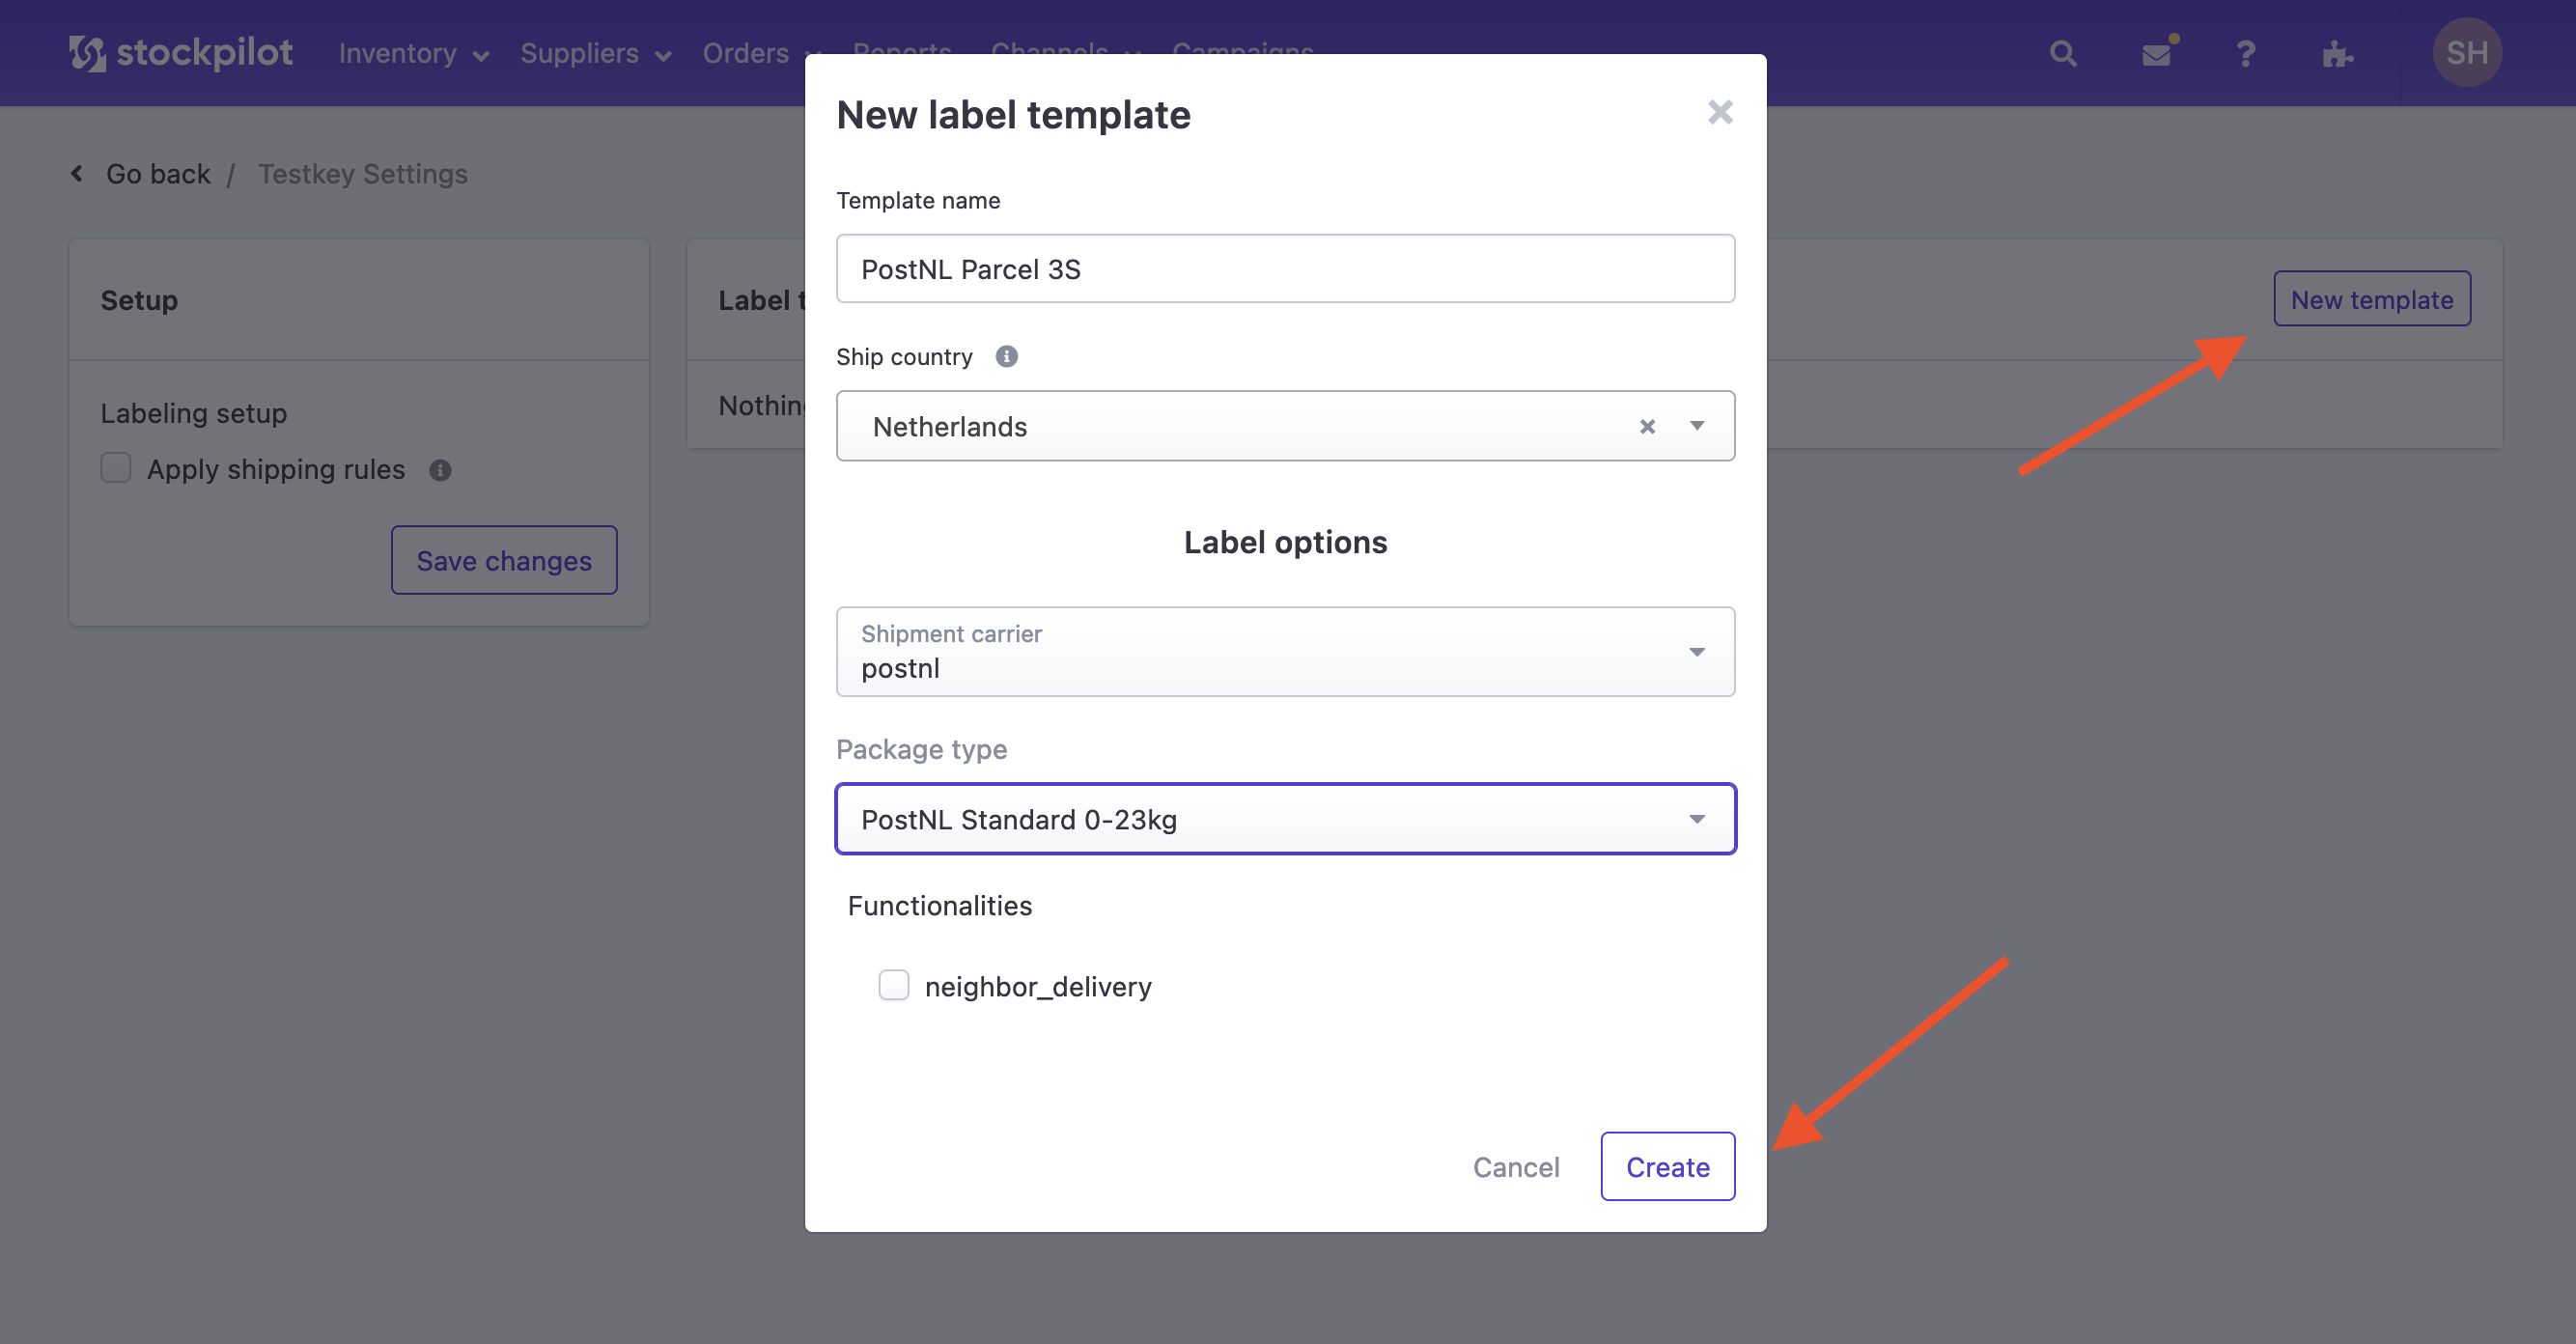
You see the label template now appearing and as a next step we can try it out to see how it works.
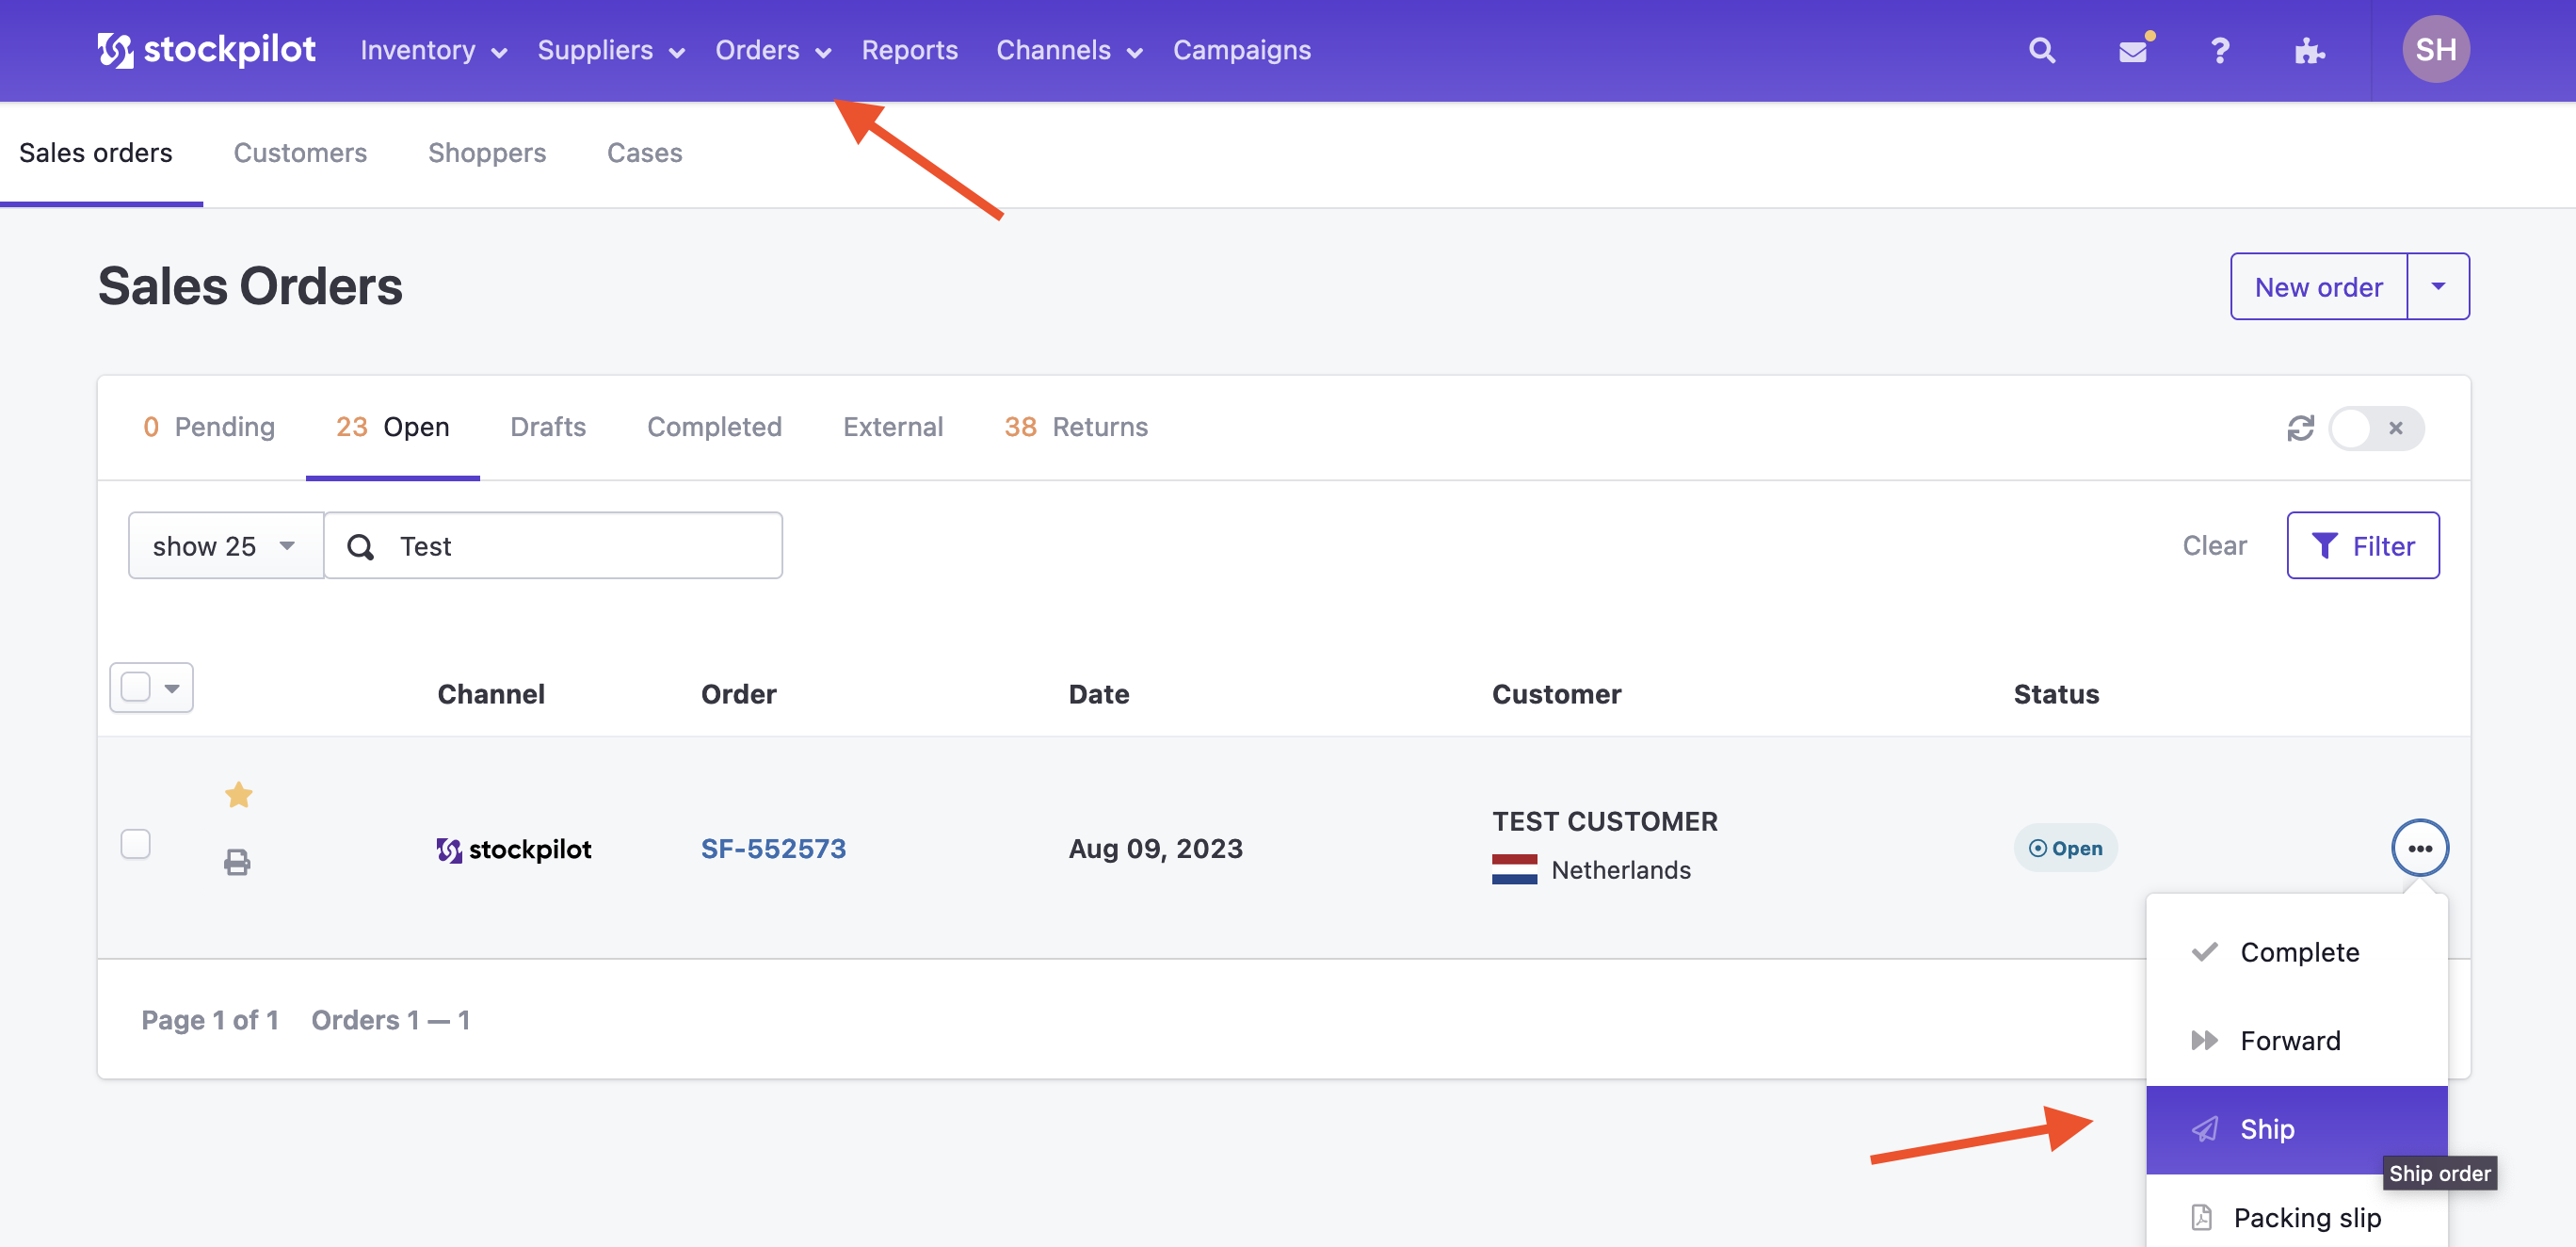
Navigate to Orders > Sales orders in the top menu bar and lets ship an order.
In the first step you choose the shipping carrier where we just created our template for and in the second step we click the Setup button. You see the template now appearing as a button below the Label templates header.
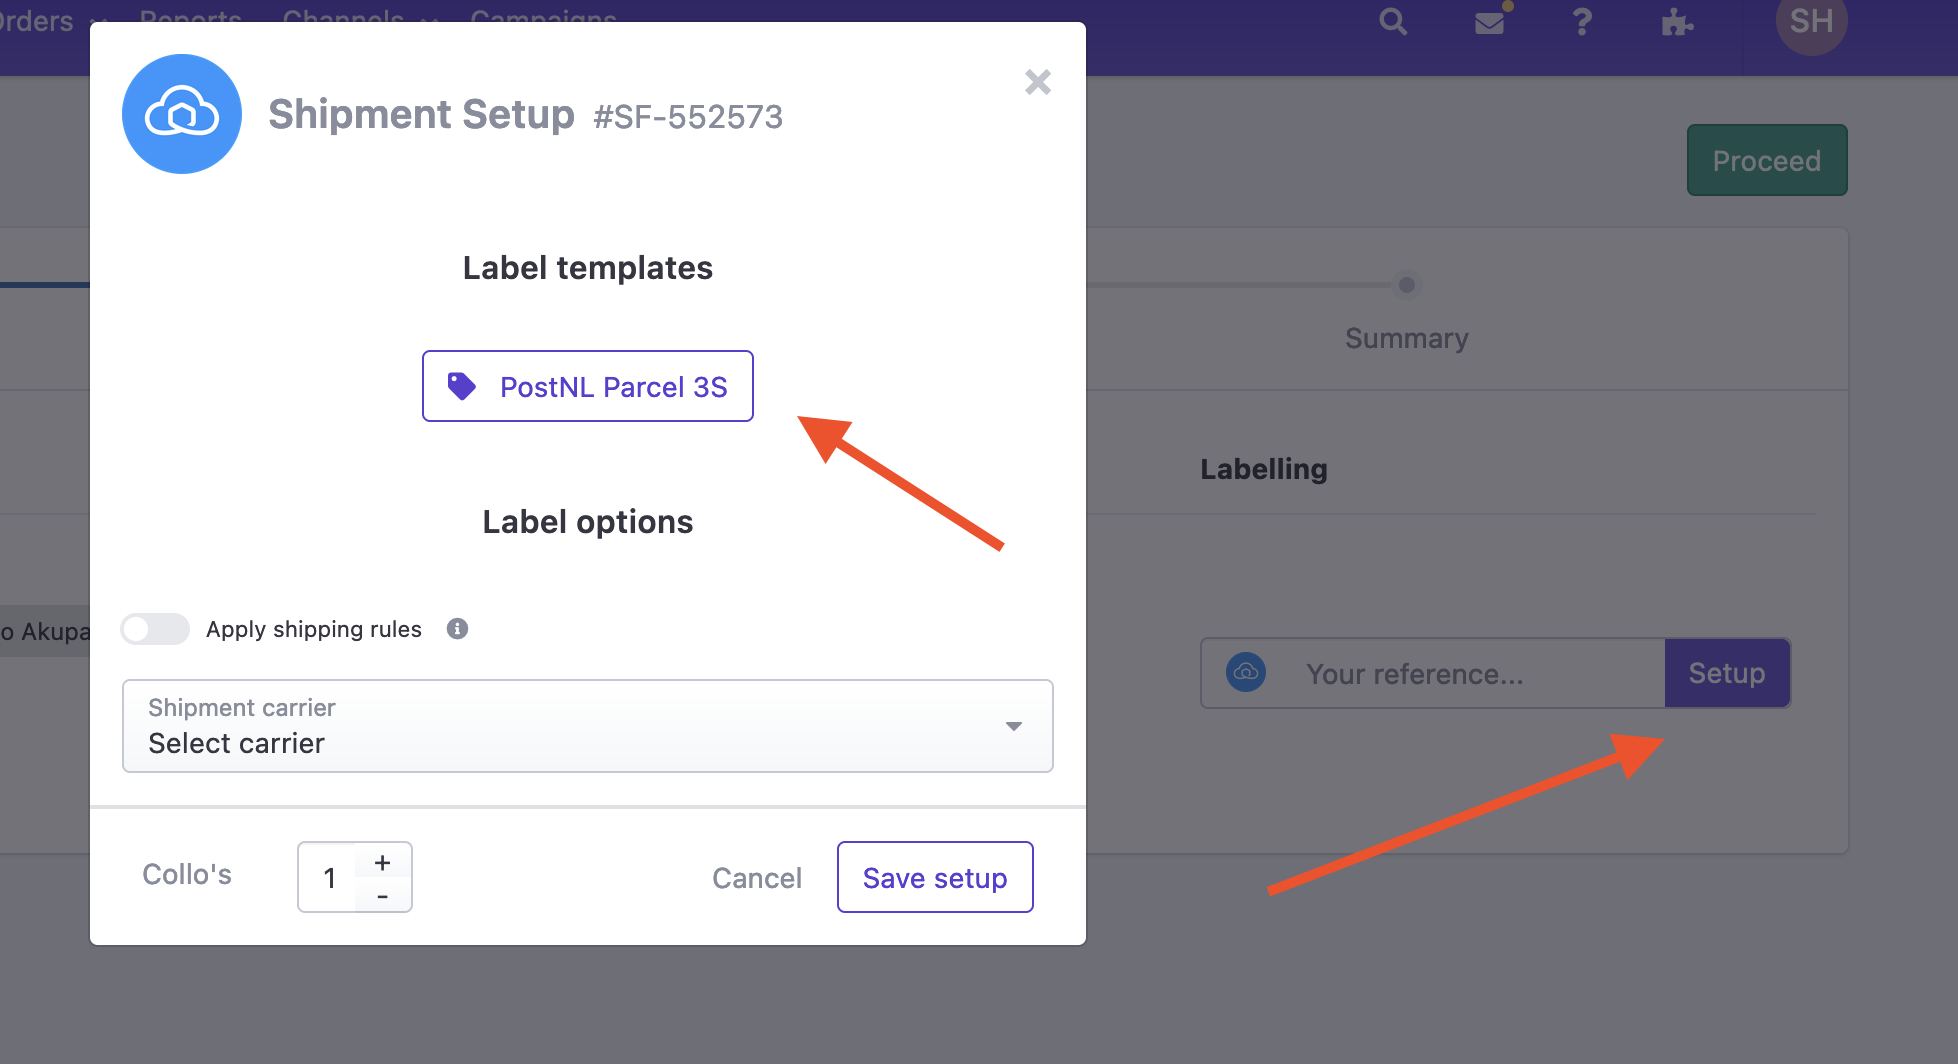
Instead of going through the usual Label options we can now click on the template and you'll see checker appearing next to Setup. Lets click Proceed.

In the final step you can click the Labels button and as you can see it will print out the correct label.
You can easily use these label templates when you create shipping rules. Read more on how that's done in this article of the knowledge base.
I hope this article gives a good overview on how to create and use shipping label templates. If you have any questions, please contact us by chat, phone or email!